Table of Contents
1. Partition Hard Drive using GParted
2. Ubuntu Installation
3. Ubuntu Configuration
4. VirtualBox
5. Quickemu
6. Desktop Environments (DEs)
7. Linux Links
Linux Ubuntu Configuration
Install Extra Software
1. Update & Upgrade: in Unity, to get a command mode, either
click on the square elypsis, or hit the <Window Key> and type terminal.
In a command terminal, either use the sudo <command> or enter
'sudo su' and execute:
# apt update
$ sudo su
# apt upgrade
# apt autoremove
# apt install -y synaptic
2. Go to Menu | System | System Tools | Synaptic Package Manager.
In Unity, you should hit the <Windows Key> and type 'Synaptic'.
3. Under Menu | Settings | Repositories | Other Software tab. Select:
[√] Canonical Partners
[ ] Canonical Partners (Source Code)
Note: you will be asked to reload the current list.
3. You can use vim to make a bash executable in a file called install.sh
that includes the following lines:
#!/bin/bash
apt install -y adobe-flashplugin
apt install -y apache2
apt install -y brasero
apt install -y chromium-browser
apt install -y filezilla
apt install -y gimp
apt install -y gimp-help-en
apt install -y gir1.2-brasero-3.1
apt install -y gsmartcontrol
apt install -y gstreamer1.0-plugins-bad
apt install -y gstreamer1.0-qt5
apt install -y gwenview
apt install -y hplip-gui
apt install -y jedit
apt install -y libcurl3-nss
apt install -y libreoffice
apt install -y lubuntu-restricted-extras
apt install -y lxqt
apt install -y mysql-client
apt install -y mysql-server
apt install -y nemo
apt install -y net-tools
apt install -y nfs-common
apt install -y openbox
apt install -y printer-driver-hpijs
apt install -y tesseract-ocr
apt install -y thunar
apt install -y traceroute
apt install -y ttf-mscorefonts-installer
apt install -y variety
apt install -y vlc
apt install -y wx-common
apt install -y xsane
apt install xscreensaver
apt install -y xscreensaver-data-extra
apt install -y xscreensaver-gl
apt install -y xscreensaver-gl-extra
4. Optional entries include:
apt install -y emacs
apt install -y variety
apt install -y virtualbox
apt install -y virtualbox-dkms
apt install -y virtualbox-ext-pack
apt install -y virtualbox-guest-additions-iso
apt install -y virtualbox-guest-dkms
apt install -y virtualbox-guest-utils
apt install -y virtualbox-guest-x11
apt install -y virtualbox-qt
apt install -y wx-common
5. Execute the above file:
# ./install.sh
6. Reboot the computer:
# reboot
Desktop Environment (DE), use LXQt
1. At the log in screen, hit the <username> (my username = 'kevin'):
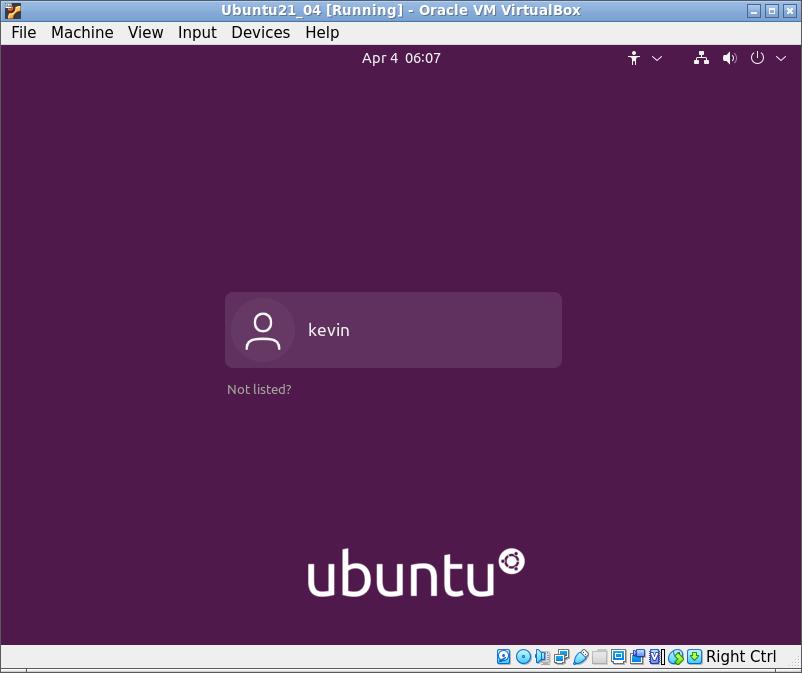
2. Before you type your password, click on the round, white settings icon
in the lower right corner. You will see option 'LXQt Desktop'. Select this.
Then, type your password and hit 'Enter':

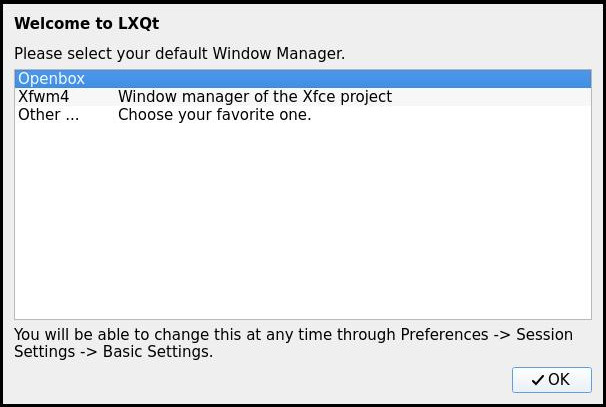
3. At the 'Welcome to LXQt' dialog, the default selection should be 'Openbox'.
Keep this and hit 'OK':
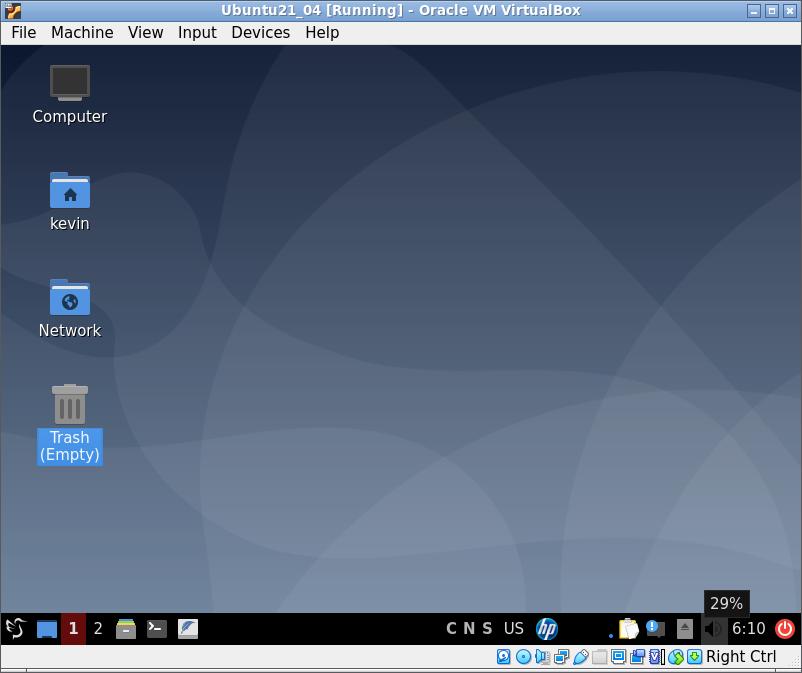
4. You should log into the LXQt DE, which should look like this:
Adjust the Screen Display
1. Most of the time, the default settings will work
automatically. Occasionally, the wrong screen resolution will
be selected. To fix this, go to Menu | Settings | Display.
Use the following common settings:
| # | Width | Height | Ratio | W:H | Comment | |
|---|---|---|---|---|---|---|
| 1 | 2560 | 1440 | 1.78 | 16:9 | Lenovo ThinkBook | |
| 2 | 2048 | 1152 | 1.78 | 16:9 | (Trial 1) | |
| ► | 3 | 1920 | 1080 | 1.78 | 16:9 | Desktop 24” Monitor |
| 4 | 1680 | 1050 | 1.60 | 16:10 | ||
| 5 | 1600 | 900 | 1.78 | 16:9 | ||
| 6 | 1440 | 810 | 1.78 | 16:9 | ||
| 7 | 1280 | 720 | 1.78 | 16:9 | ||
| 8 | 1024 | 576 | 1.78 | 16:9 | ||
| 9 | 1368 | 768 | 1.78 | 16:9 | Lenovo Flex |
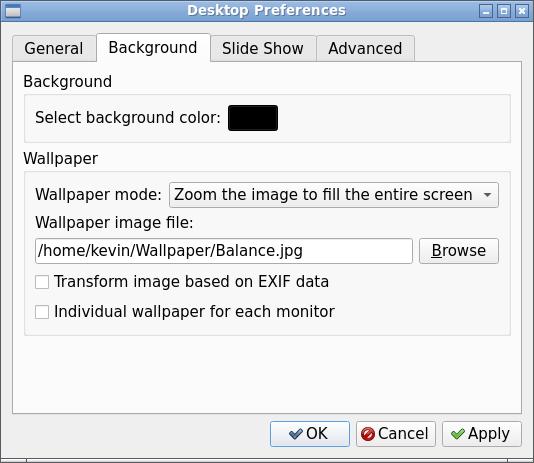
Install Wallpaper
1. You can add a new folder named 'Wallpaper' and add files
or download files to this location. Then you right click on the
desktop and select 'Desktop Preferences'. In the following
dialog, click the tab 'Background' and under 'Wallpaper
image file:' you can click the 'Browse' button to navigate
to your 'Wallpaper' folder.
2. Alternatively, you can install an application called 'variety'
to cycle through all the files in this folder.
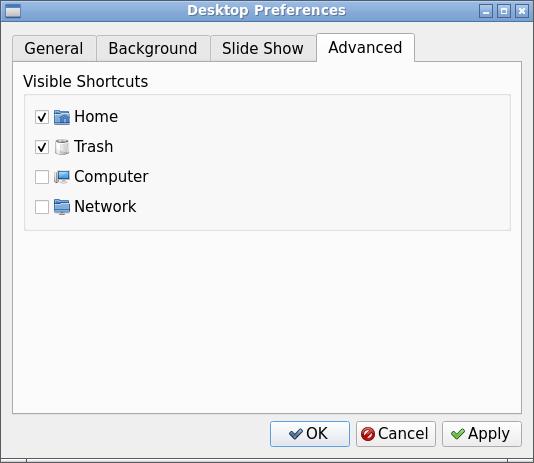
Install Desktop Icons
1. Right click on the desktop, select Desktop Preferences,
and click the tab Advanced. Select:
[√] Home
[√] Trash
[ ] Computer
[ ] Network
2. Alternatively, you can use dconf-editor. In a terminal,
execute:
# apt install dconf-editor
3. Go to Menu | System Tools | dconf Editor
4. Navigate to org | nemo | desktop
[x] home-icon-visible
[√] show-desktop-icons
[√] trash-icon-visible
5. Also, in a terminal you can copy files from
/usr/share/applications/ to the desktop. In a terminal,
execute:
$ sudo su
# cd /usr/share/applications/
# cp firefox.desktop /home/<username>/
# cd /home/<username>/
# chown <username>:<username> firefox.desktop
# chmod 775 firefox.desktop
# exit
$ exit
Configure fstab
1. Use jedit, emacs, vim or any text editor that you choose. I like jedit.
In a terminal, execute:
$ sudo su
# cd /etc
# cp fstab fstab-orig
# jedit /etc/fstab:
#
# /etc/fstab


# /dev/{sda1 | sda2 | sda3}
# file system      mount     type options           dump pass
UUID=65f1 ...      /boot/efi vfat umask=0077        0    1
UUID=5b50 ... 32cc none      swap sw                0    0
UUID=d019 ... d0db /         ext4 errors=remount-ro 0    1
UUID=8c62 ... adbf /home     ext4 defaults          0    2

# Linux shares
192.168.#.#:/home/<user> /mnt/<userserv> nfs  defaults 0 0
192.168.#.#:/mnt/backup  /mnt/backup     nfs  defaults 0 0
2. You can obtain UUID using command Blkid:
# blkid | grep sd
3. You need to create mount points. In a terminal, execute:
# cd /mnt
# mkdir <user>
# mkdir backup
# chown <user>:<user> *
# chmod 775 *
# mount -a
4. You can create a link on the desktop. Execute:
$ cd ~/Desktop
$ ln -s /mnt/<username> <username>
$ ln -s /mnt/backup Backup
5. Double click on the desktop icon, and the folder should open
and display the appropriate shares.
Configure Network
1. No configuration necessary. Keep DHCP.
Configure Screensaver
1. Go to Menu | Preferences | Screensaver:
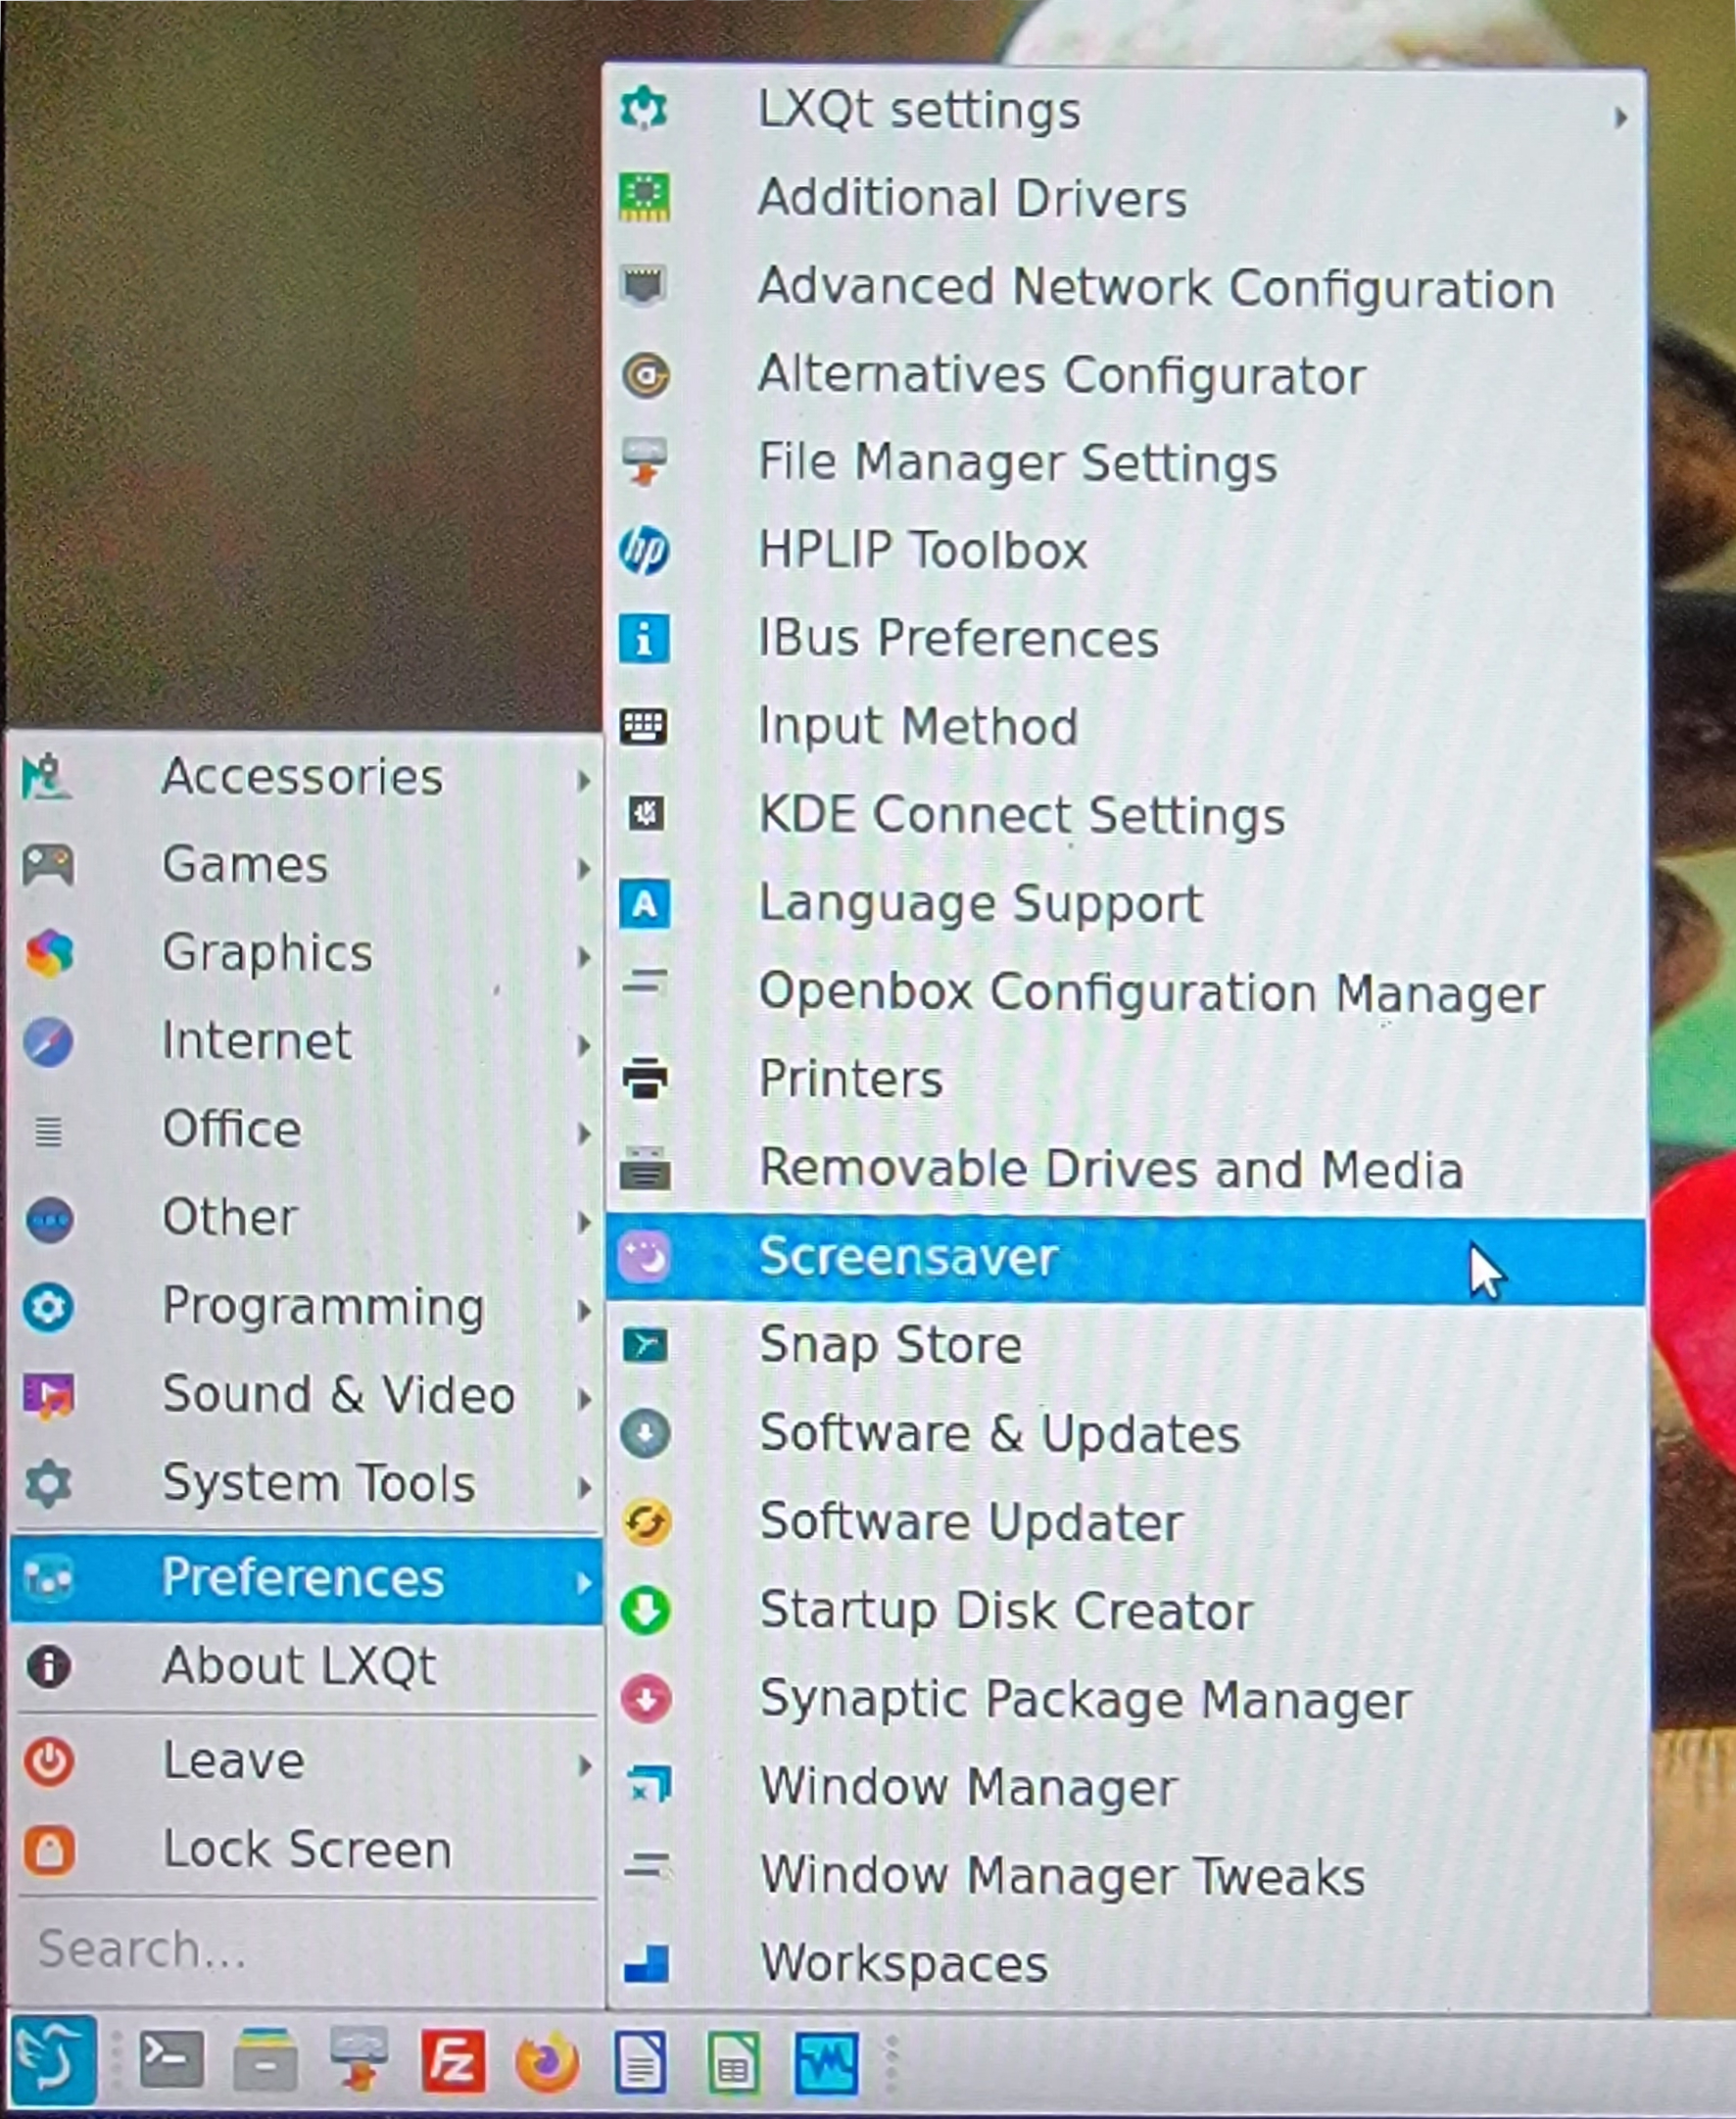
2. You should see the following screen:
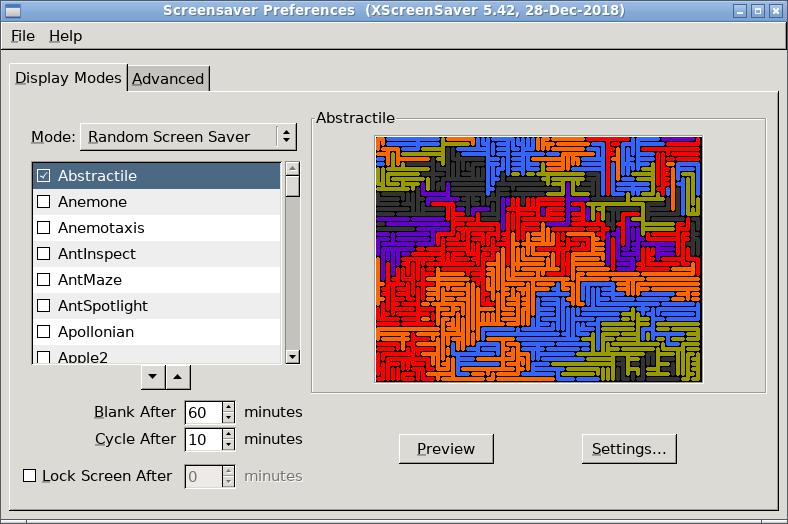
3. My favorite selections are:
| Abstractile | Drift | Noof | |
|---|---|---|---|
| BinaryRing | Epicycle | Pacman | |
| BlockTube | Flame | Penrose | |
| BoxFit | FluidBalls | Pipes | |
| Bubble3D | Geodesic | Pong | |
| Bumps | GLKnots | Rorschach | |
| Ccurve | GLPlanet | Rubik | |
| Cityflow | Stairs | ||
| CloudLife | Helix | Starfish | |
| Coral | Hilbert | Substrate | |
| Crackberg | Hynowheel | Surfaces | |
| CubeGrid | Interaggregate | Wander | |
| Cynosure | Lavalite | Xspirograph | |
| Discrete | Maze |
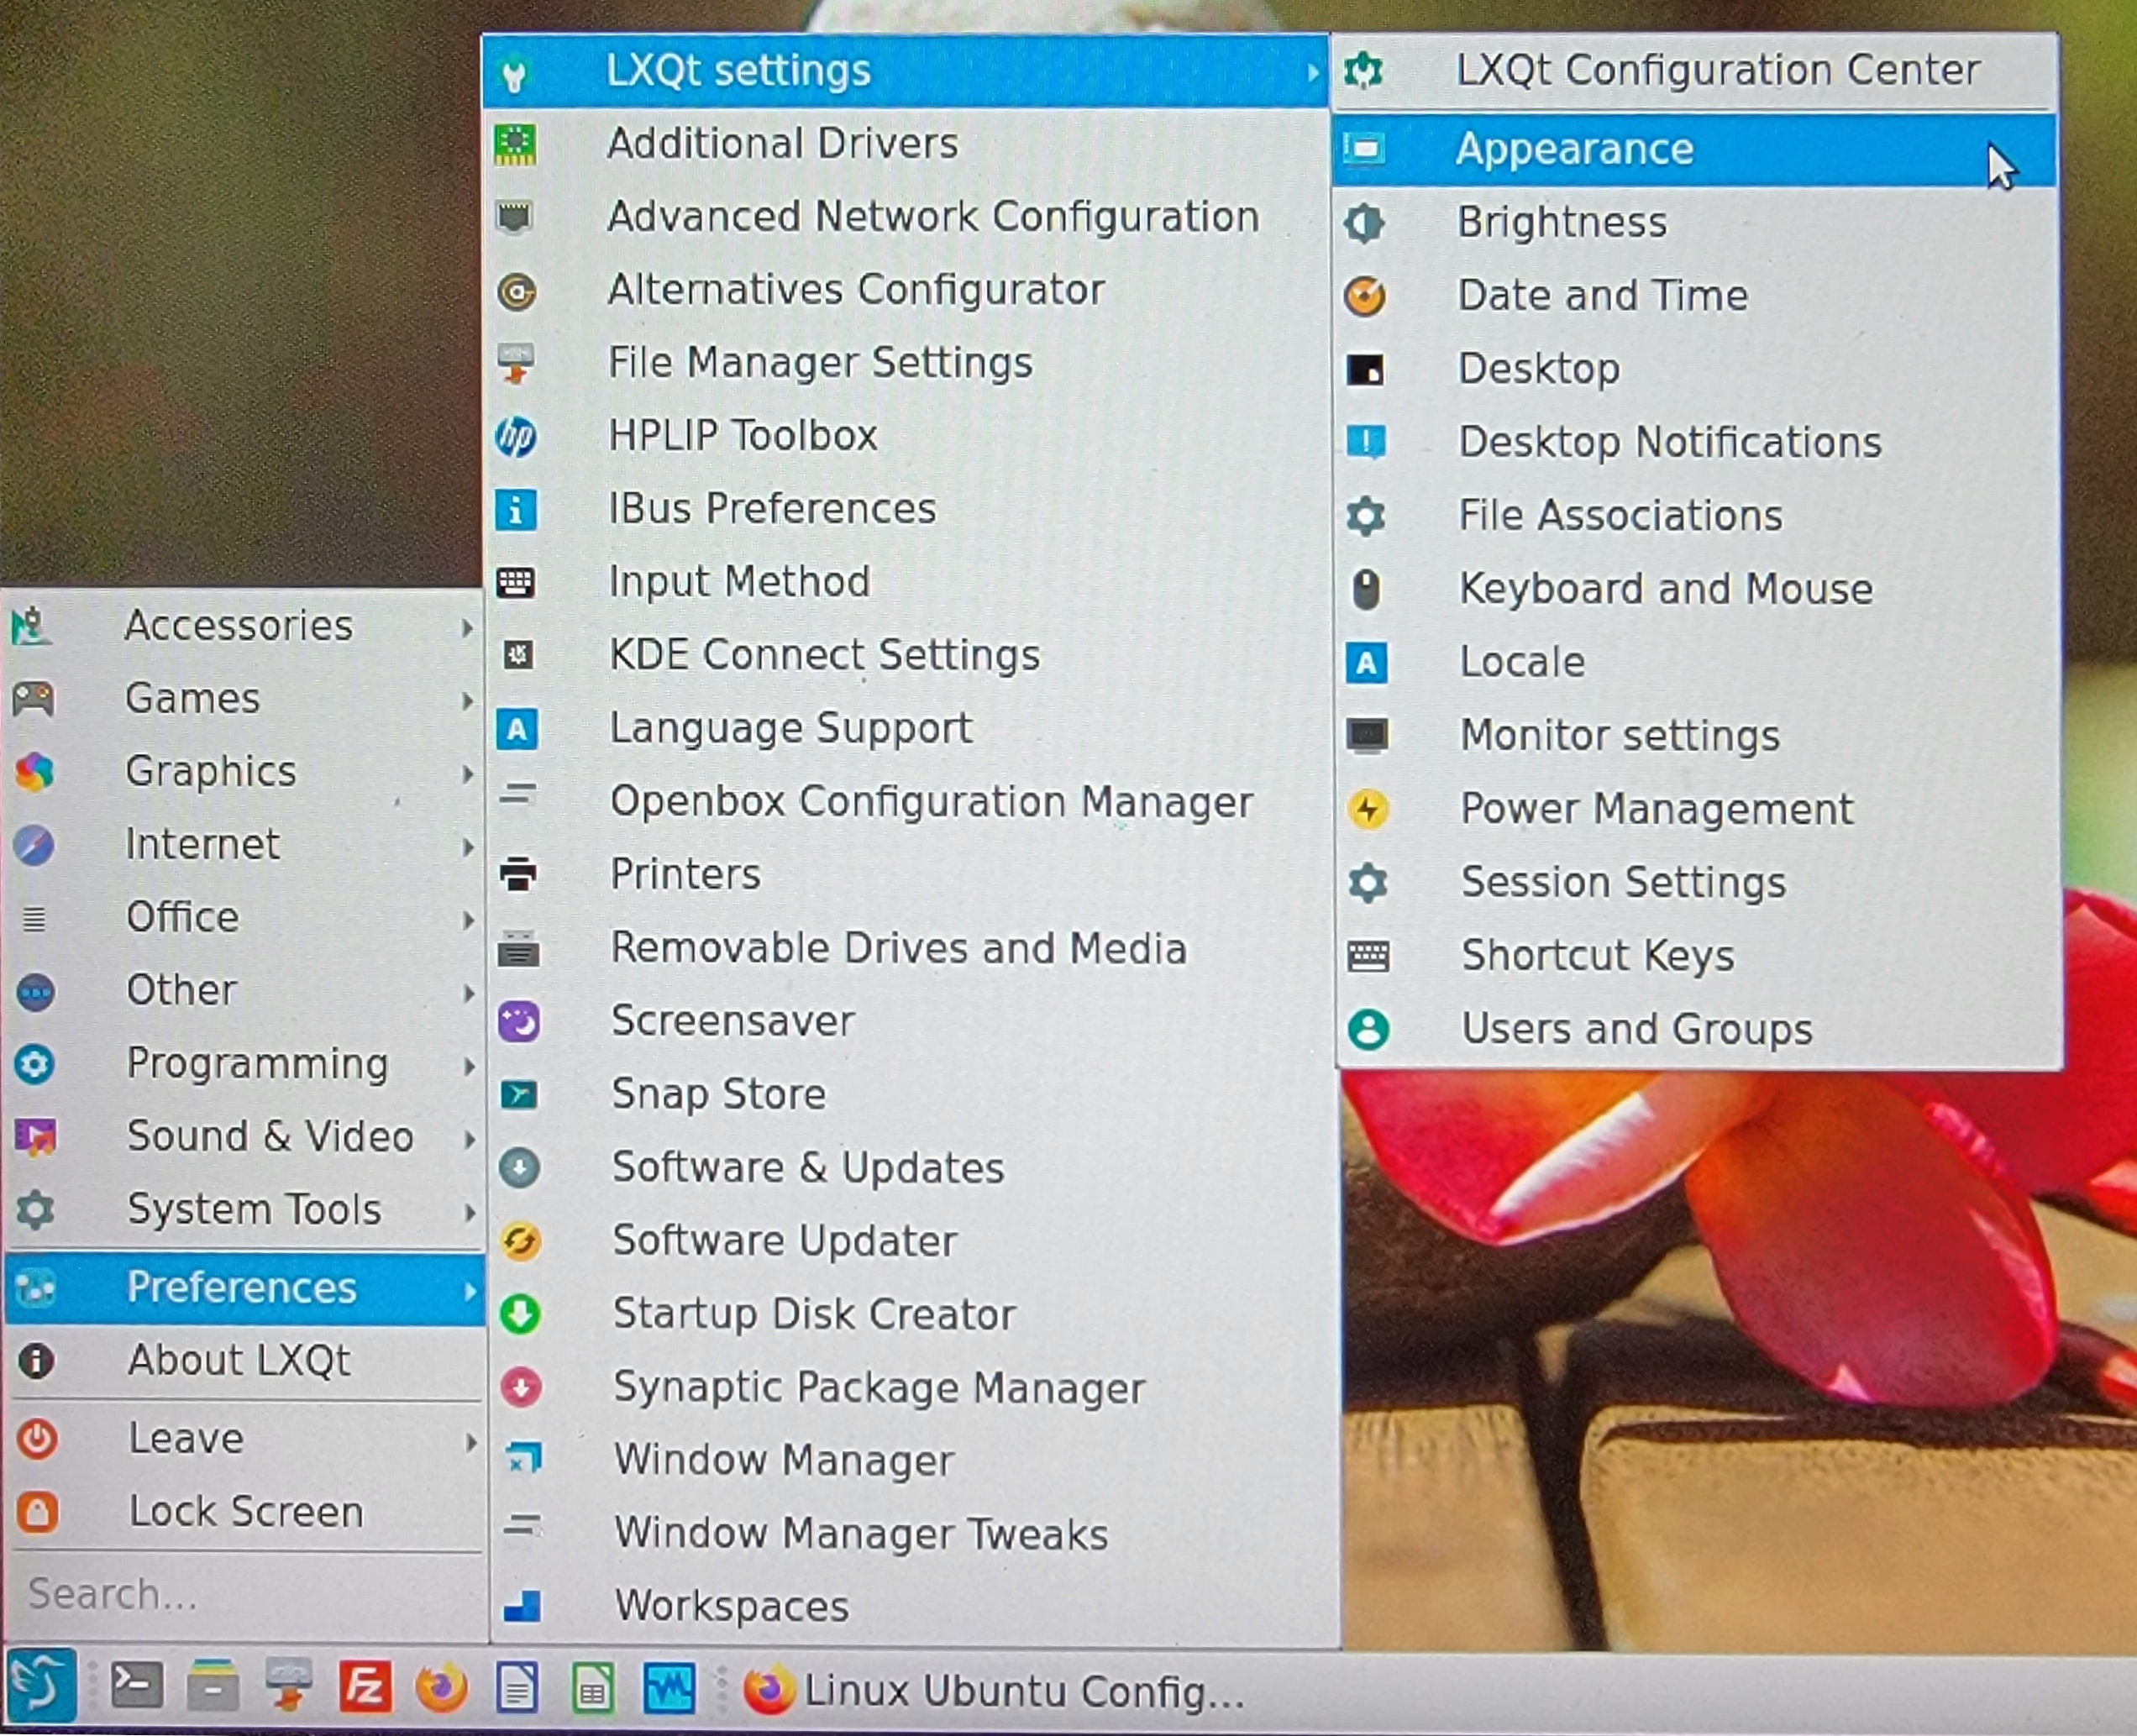
Configure Themes
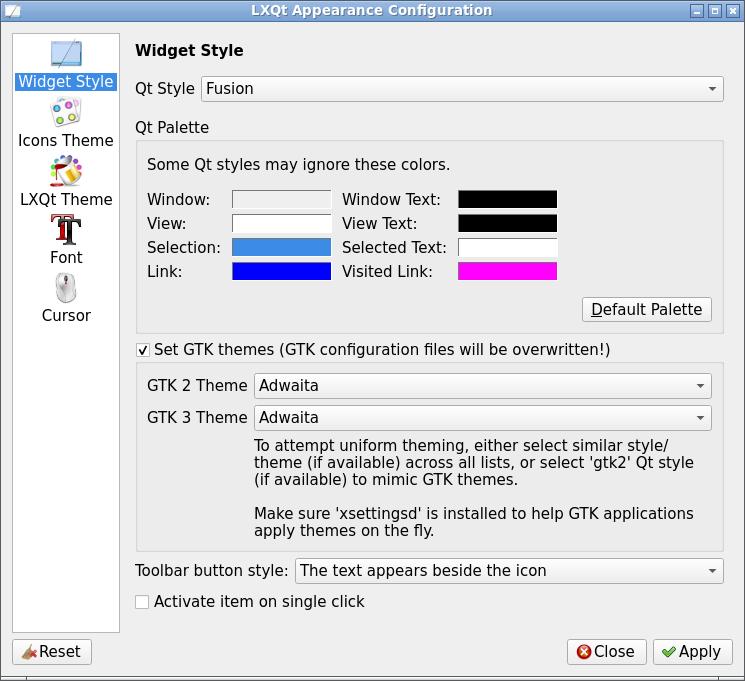
1. Go to Menu | Preferences | LXQt settings | Appearance.
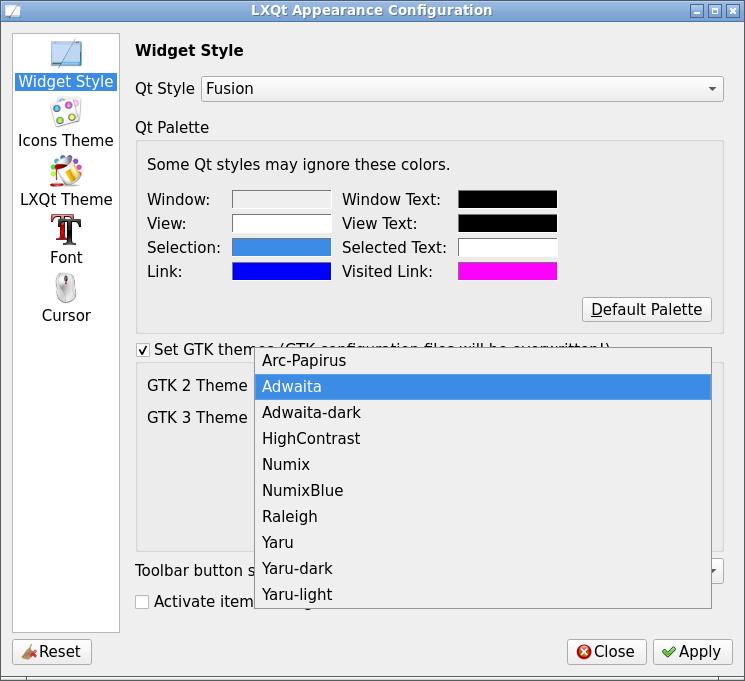
2. Click 'Widget Style' and you will see the following screen.
At 'QT Style' select 'Fusion' with the pull down menu.
Click 'Set GTK themes ...' and at 'GTK 2 Theme' and
'GTK 3 Theme', select 'Adwaita' with the pull down menu.
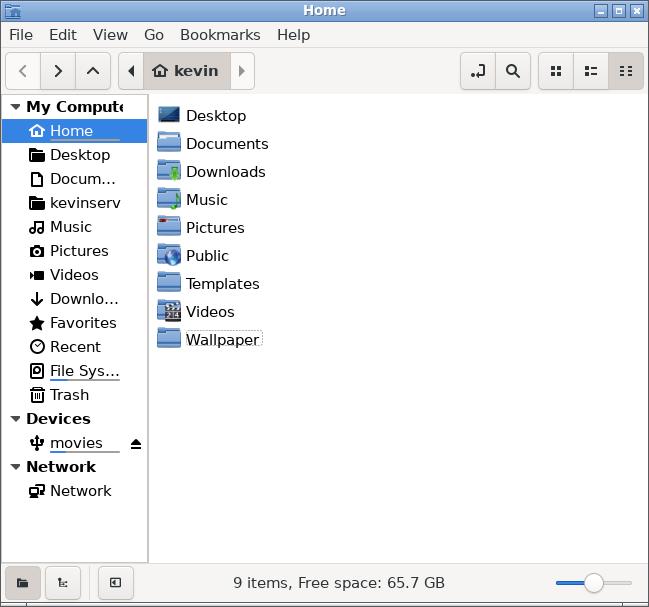
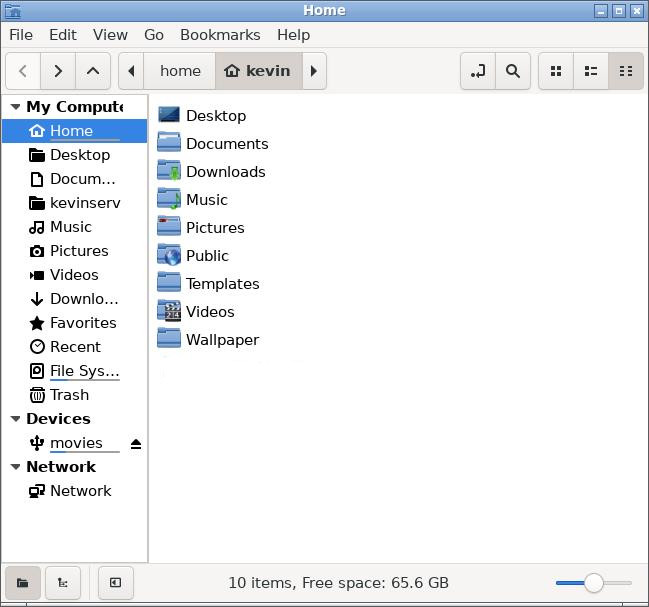
3. If you toggle between 'Adwaita' and 'Adawaita-dark' and open a
file dialog (a widget), you will notice that the format toggles between
the following two images:

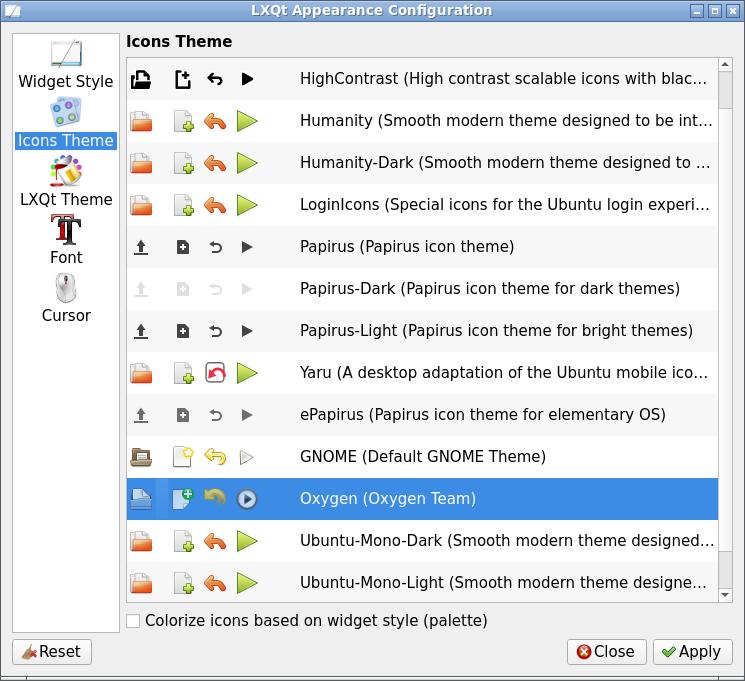
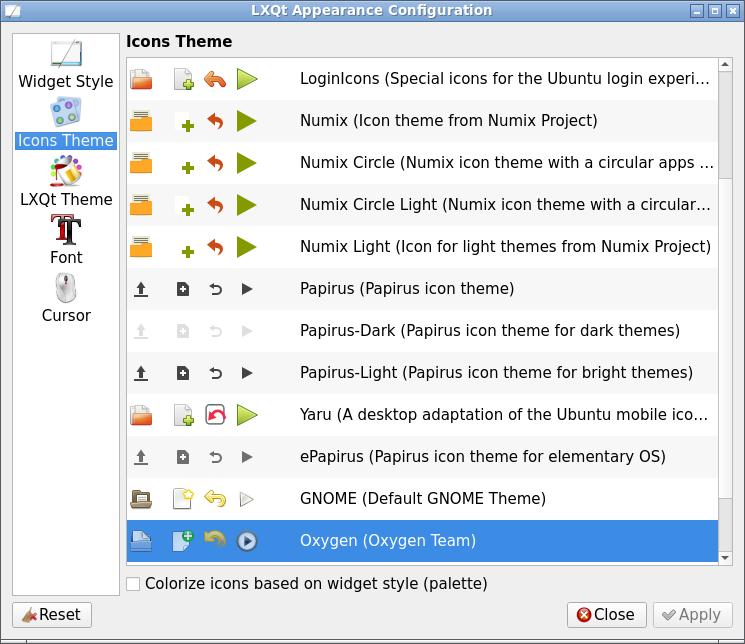
4. Click 'Icons Theme' and you will see the following screen.
Under 'Icons Theme' select 'Oxygen'.
5. If you toggle between 'Oxygen' and 'GNOME' and open the same
file dialog, you will notice that the format toggles between the following
two images:


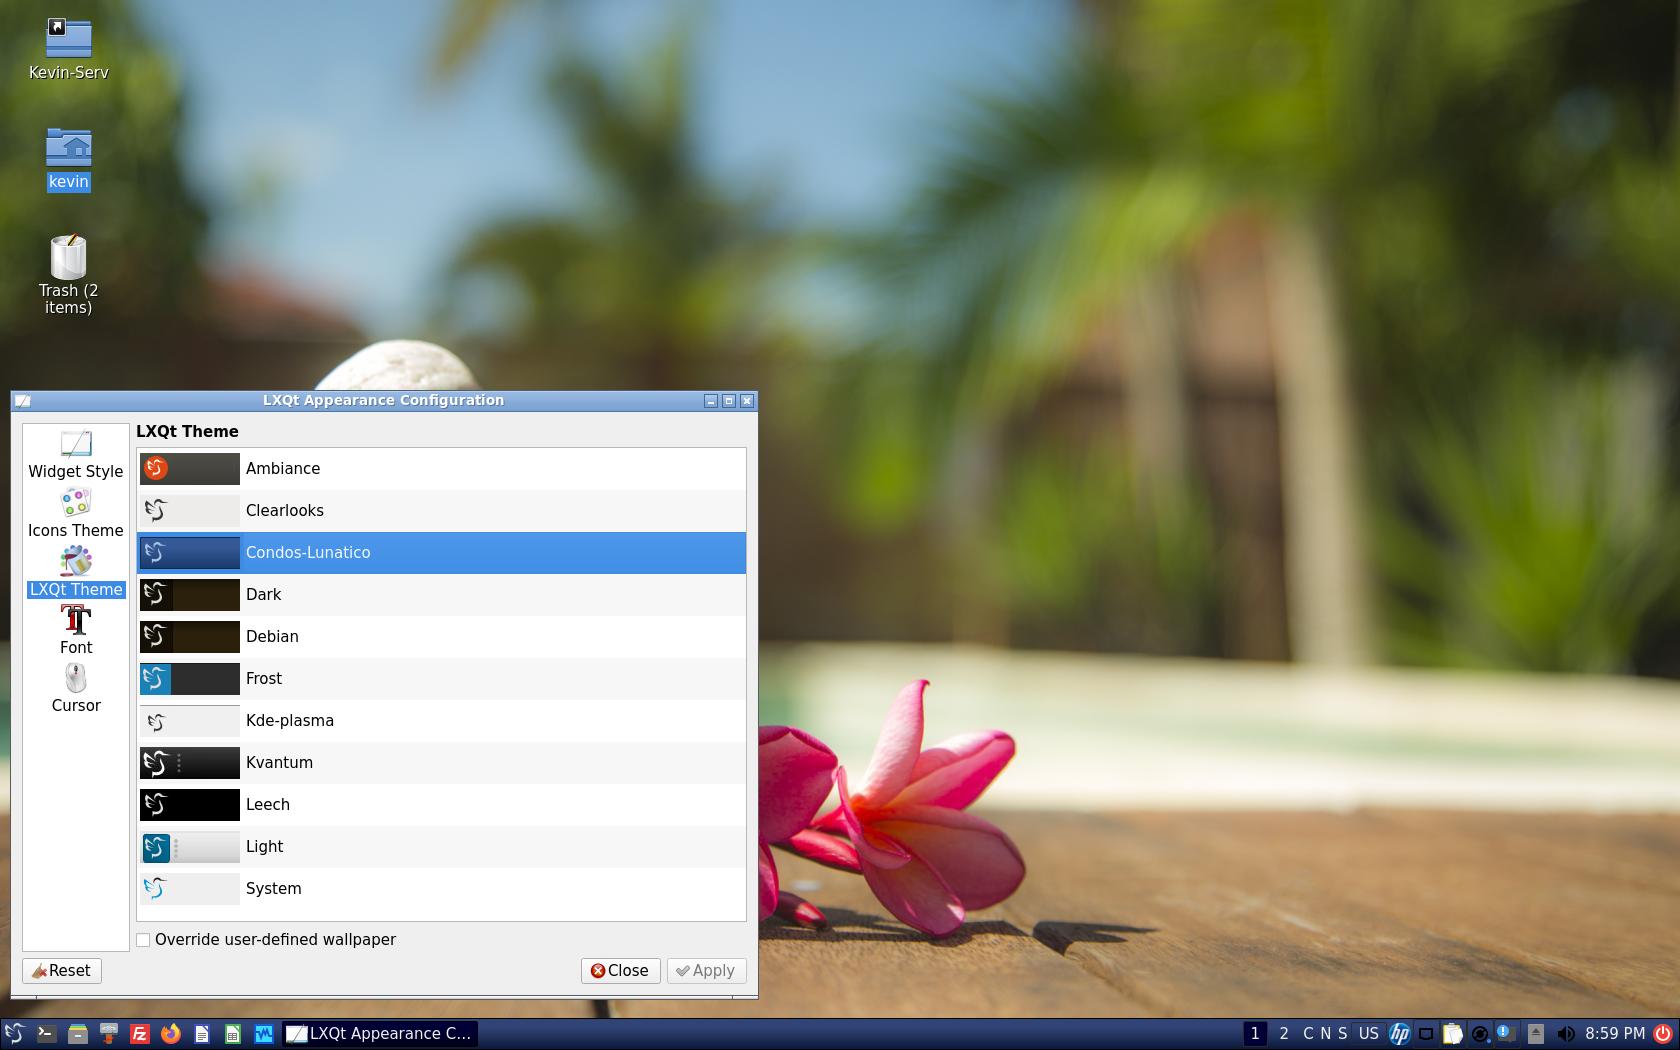
6. Click 'LXQt Theme' and you will see the following screen.
Under 'LXQt Theme' select 'Light'.
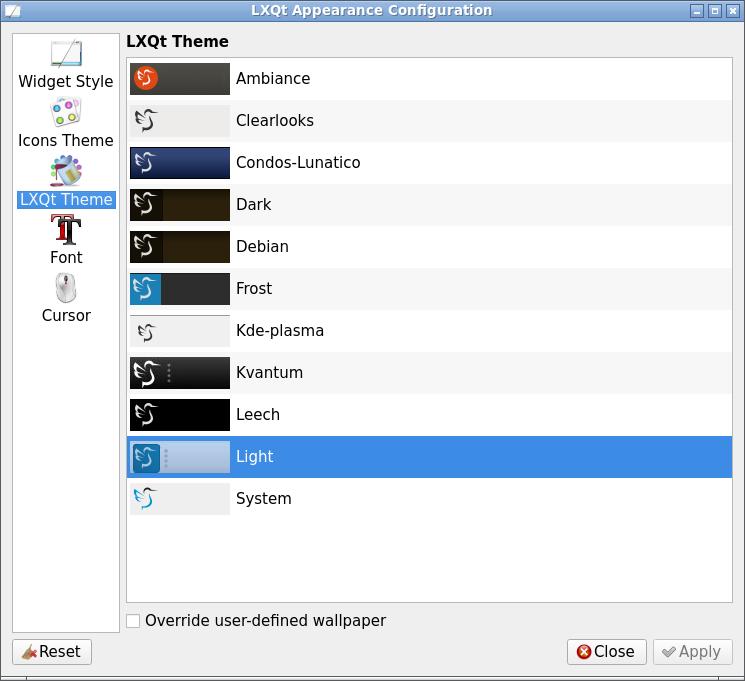
7. If you toggle between 'Light' and 'Leech' you will notice the bottom panel
change between the following two images:

8. You can click on 'Font' and 'Cursor' to configure these items, but rarely
have I had to change these.
Download and Install New Themes
1. You can install additional themes that are not included in the default package.
There are several options: (a) Use synaptic and (b) download from the internet.
2. In the first option, you can open a terminal and execute:
$ sudo su
# apt-cache search numix
Output:
numix-blue-gtk-theme - Variant of the Numix theme with blue highlights
numix-gtk-theme - modern flat theme from the Numix project
numix-icon-theme - modern icon theme from the Numix project
numix-icon-theme-circle - Circle icon theme from the Numix project
3. You will notice two sets of themes: one set has 'gtk' and the other has 'icon'
in the name. If you return to the above dialog for 'Widget Style', you will
notice 'GTK 2 Theme' and 'GTK 3 Theme'. Also, you will notice an above
dialog for 'Icon Theme'. Install these themes by executing:
# apt install -y numix-blue-gtk-theme
# apt install -y numix-gtk-theme
# apt install -y numix-icon-theme
# apt install -y numix-icon-theme-circle
4. Now if you return to the 'LXQt Appearance Configuration' dialog and select
'Widget Style', you will see two choices for Numix:
5. Likewise, in the same dialog, if you click on 'Icons Theme', you will notice four
new entries for Numix:
6. In the second option, you can download a set of files from a website. If you
use URL https://www.gnome-look.org/p/1193861, you can download Arc-Ambiance
as a zip file. Then, in a terminal execute:
# unzip filename.zip
# tar -xf filename.xz
# tar -zxvf filename.tar.bz2
# tar -xvf filename.tar
# tar -zxvf filename.tar.gz
7. Whole folders can be moved to /usr/share/lxqt/themes/:
# rsync -av theme-name/ /usr/share/themes/theme-name/
8. Now your new theme will show up.
9. Condos-Lunatico can be downloaded from https://www.pling.com/p/1308107
and placed rsync'd into the same folder /usr/share/lxqt/themes/. If you return
to LXQt Themes, this will change the lower panel into a deep blue color.
Add Applicaton Icons to the Lower Panel
1. Find an application icon and drag it to the lower panel. For example, go
to 'Menu | Internet | Firefox Web Browser'. Left click and drag it no a
location just next to a quicklaunch item in the lower left corner. You will
notice a plus sign appear. Drop it there. Do not worry about the actual
order of the icons, since we shall configure this later.
2. Right click on an empty spot of the lower panel, and select 'Configure
Panel'. Select 'Widgets' and 'Quick launch'. Your dialog should look
like this:
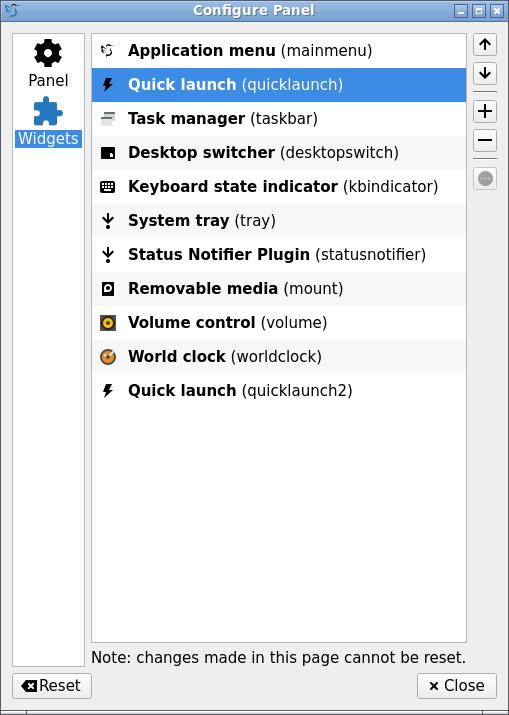
3. You can add and delete widgets by clicking the '+' and '-' buttons.
You can sort them by using the <up> and <down> arrow.
4. Sort the quicklaunch icons by going to file /home/<username>/
.config/lxqt/panel.conf. In a terminal, execute:
$ jedit panel.conf
5. Scroll down and edit the following. You can reorder it here, just make
sure that all the numbers agree, and the second last line agrees with the
number of icons:
[quicklaunch]
alignment=Left
apps\1\desktop=/usr/share/applications/qterminal.desktop
apps\2\desktop=/usr/share/applications/nemo.desktop
apps\3\desktop=/usr/share/applications/thunar.desktop
apps\4\desktop=/usr/share/applications/filezilla.desktop
apps\5\desktop=/usr/share/applications/thunderbird.desktop
apps\6\desktop=/var/lib/snapd/desktop/applications/firefox_firefox.desktop
apps\7\desktop=/usr/share/applications/libreoffice-writer.desktop
apps\8\desktop=/usr/share/applications/libreoffice-calc.desktop
apps\size=8
type=quicklaunch
To enact the change, log out and then log in.
Openbox Theme
1. Go to 'Menu | Preferences | Openbox Configuration Manager'. Click on 'Theme', then 'Clearlooks':
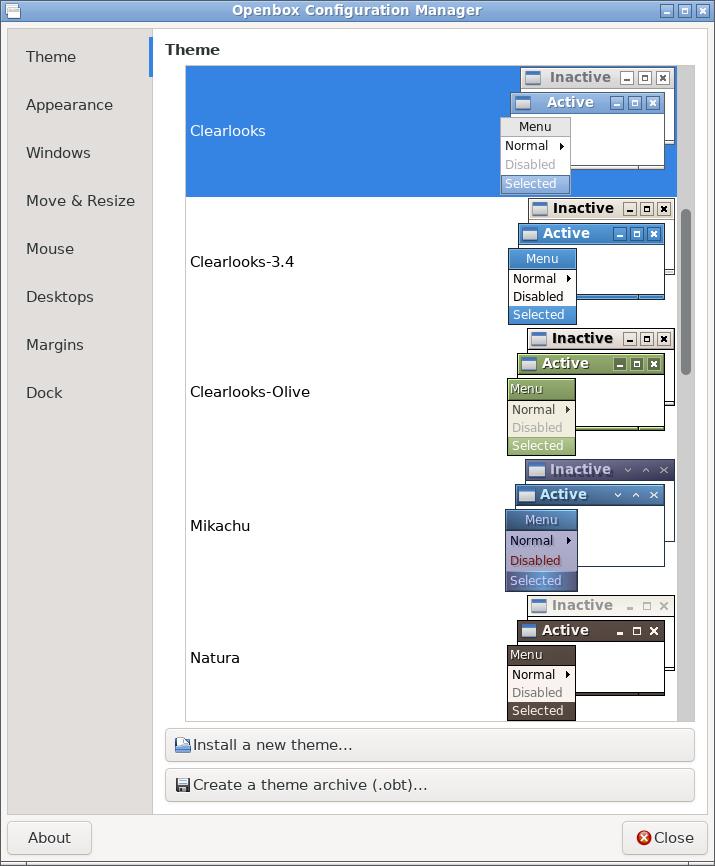
2. If you toggle between 'Clearlooks' and 'Clearlooks-Olive' and
open a file picker dialog, you can compare the two views:

top of page