Table of Contents
1. Partition Hard Drive using GParted
2. Ubuntu Installation
3. Ubuntu Configuration
4. VirtualBox
5. Quickemu
6. Desktop Environments (DEs)
7. Linux Links
Linux Ubuntu Installation
Overview:
1. Install Ubuntu 21.04
2. Enter BIOS on boot-up holding down <Del>.
3. Use the following parameters:
| Name: | <username> |
| Computer name: | <hostname-pc> |
| Password: | <password> |
4. Use the partition manager with the folllowing parameters:
| Device | Type | Mount | Format | Size |
|---|---|---|---|---|
| free space | [ ] | 1 MB | ||
| /dev/sda1 | efi | [ ] | 1073 MB | |
| /dev/sda2 | swap | [ ] | 4294 MB | |
| /dev/sda3 | ext4 | / | [ ] | 42949 MB |
| /dev/sda4 | ext4 | /home | [ ] | 71714 MB |
Note: the 'free space' was created by GParted. Do not format the
partitions since this has been done by GParted.
5. At the end of the installation, hit <Enter>, remove the
installlation disk, then upon reboot you will enter the Gnome Desktop
Environment (DE).
Get Linux Ubuntu
You can obtain Linux Ubuntu at the official web site:
You go to the 'Download' pulldown menu and select the option under
the 'Ubuntu Desktop'. Usually select the Long Term Support (LTS).
Currently, '20.04 LTS' is listed, but I use version 21.04 in this installation.
Screen Shots:
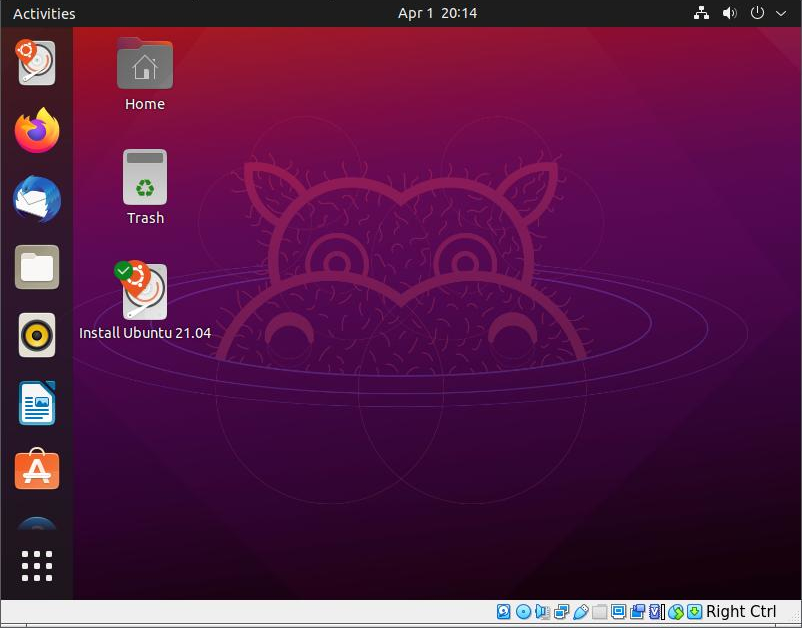
1. Insert the CD-ROM disc into the CD-ROM drive and boot from the CD-ROM drive.
The live disc will boot into the following screen. Double click on the icon 'Install
Ubuntu 21.04':
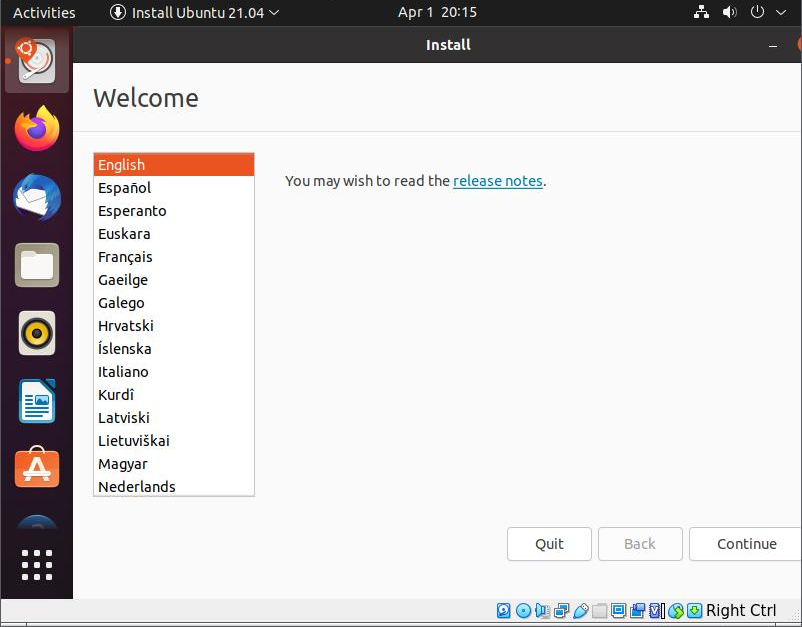
2. The Welcome screen appears. The purple dots at the bottom indicate your
progress through the installation process. You can keep most of the defeault values.
Pick your language: 'English':
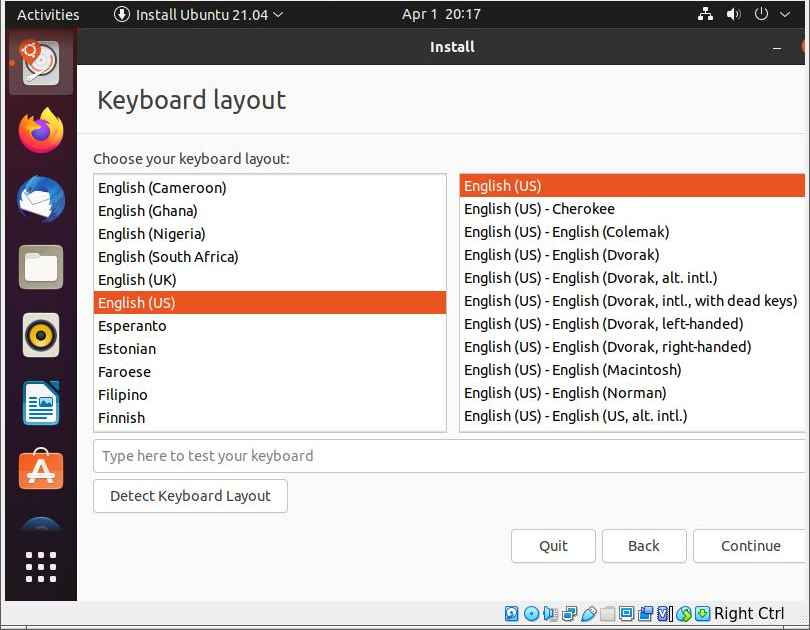
3. Keyboard layout: the default is the English QUERTY keyboard. Hit the
'Continue' button:
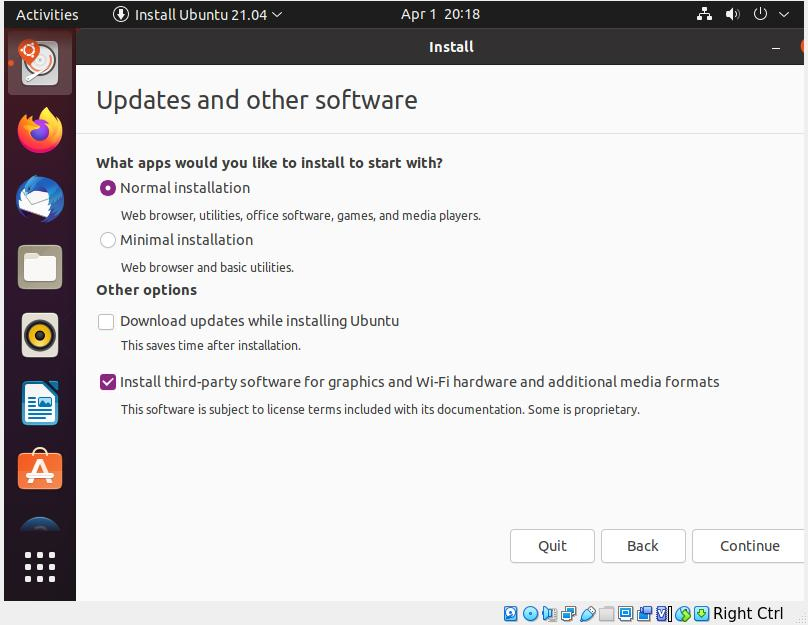
4. Updates and other software: the default is '(*) Normal installation'; however,
I unselect '[ ] Download updates while installing Ubuntu' and select '[√] Install third-
party software ...'. Hit 'Continue':
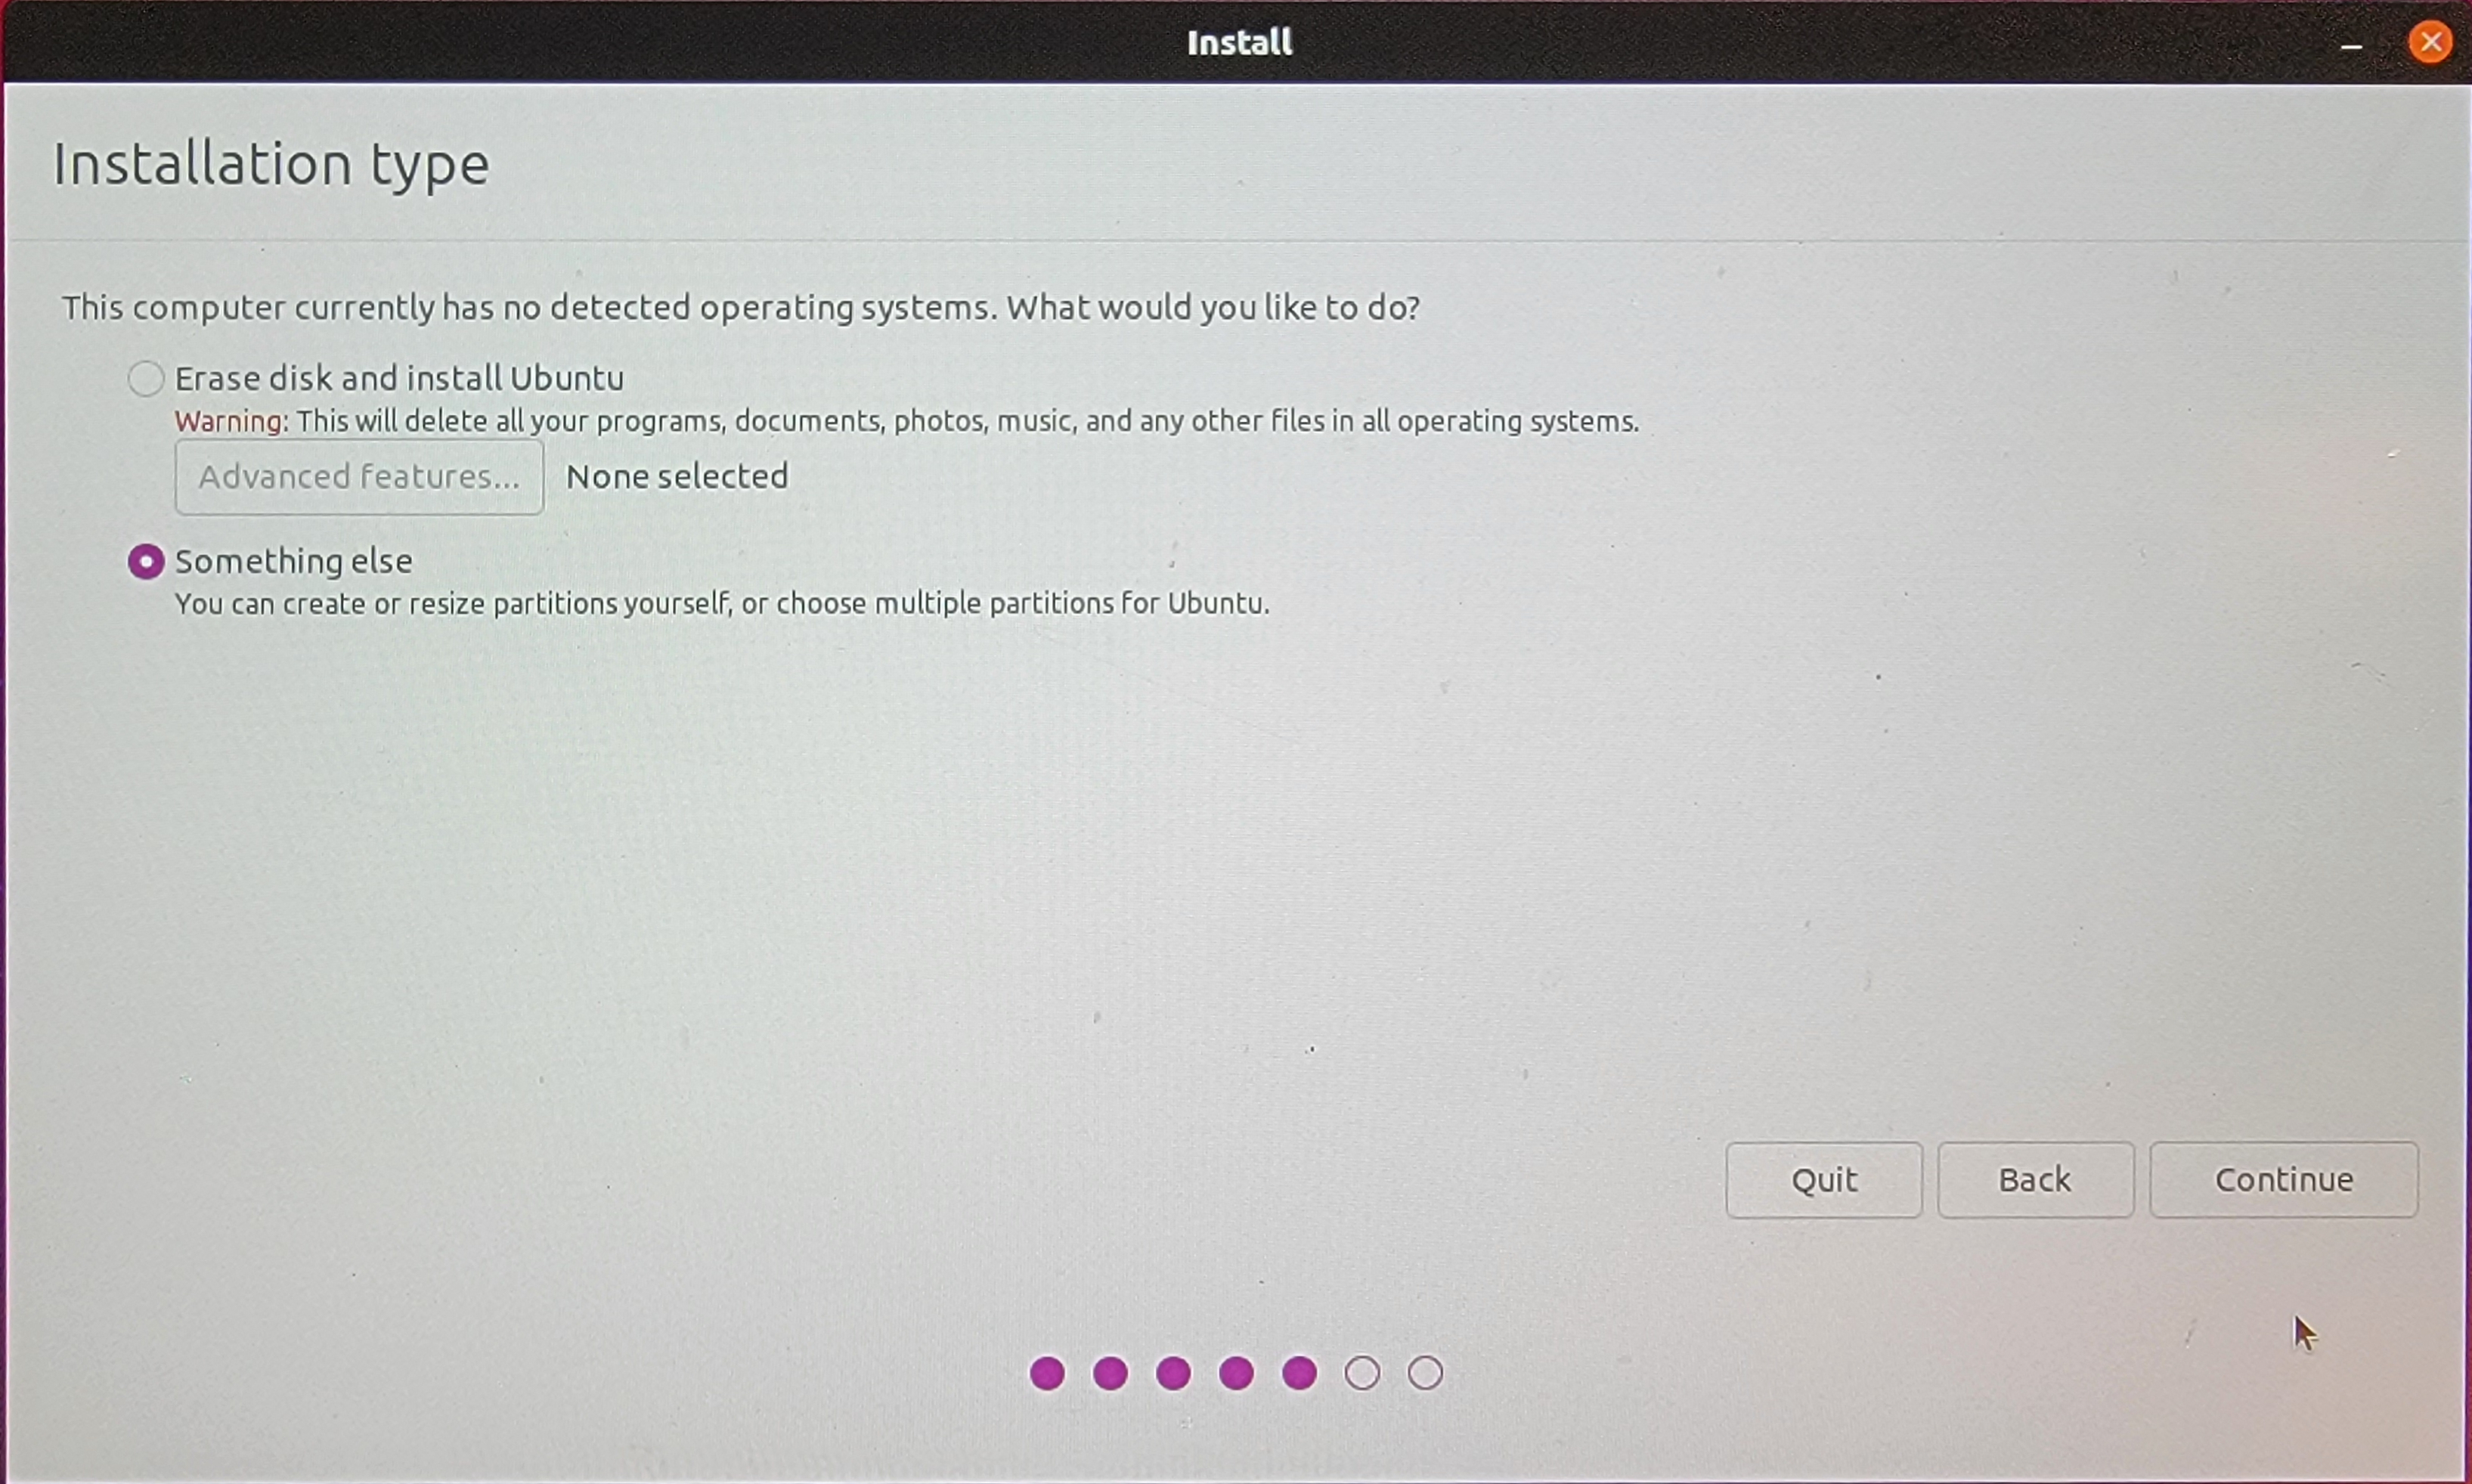
5. Installation type: unselect '[ ] Erase disk ...' and select '(*) Something else'.
Hit 'Continue':
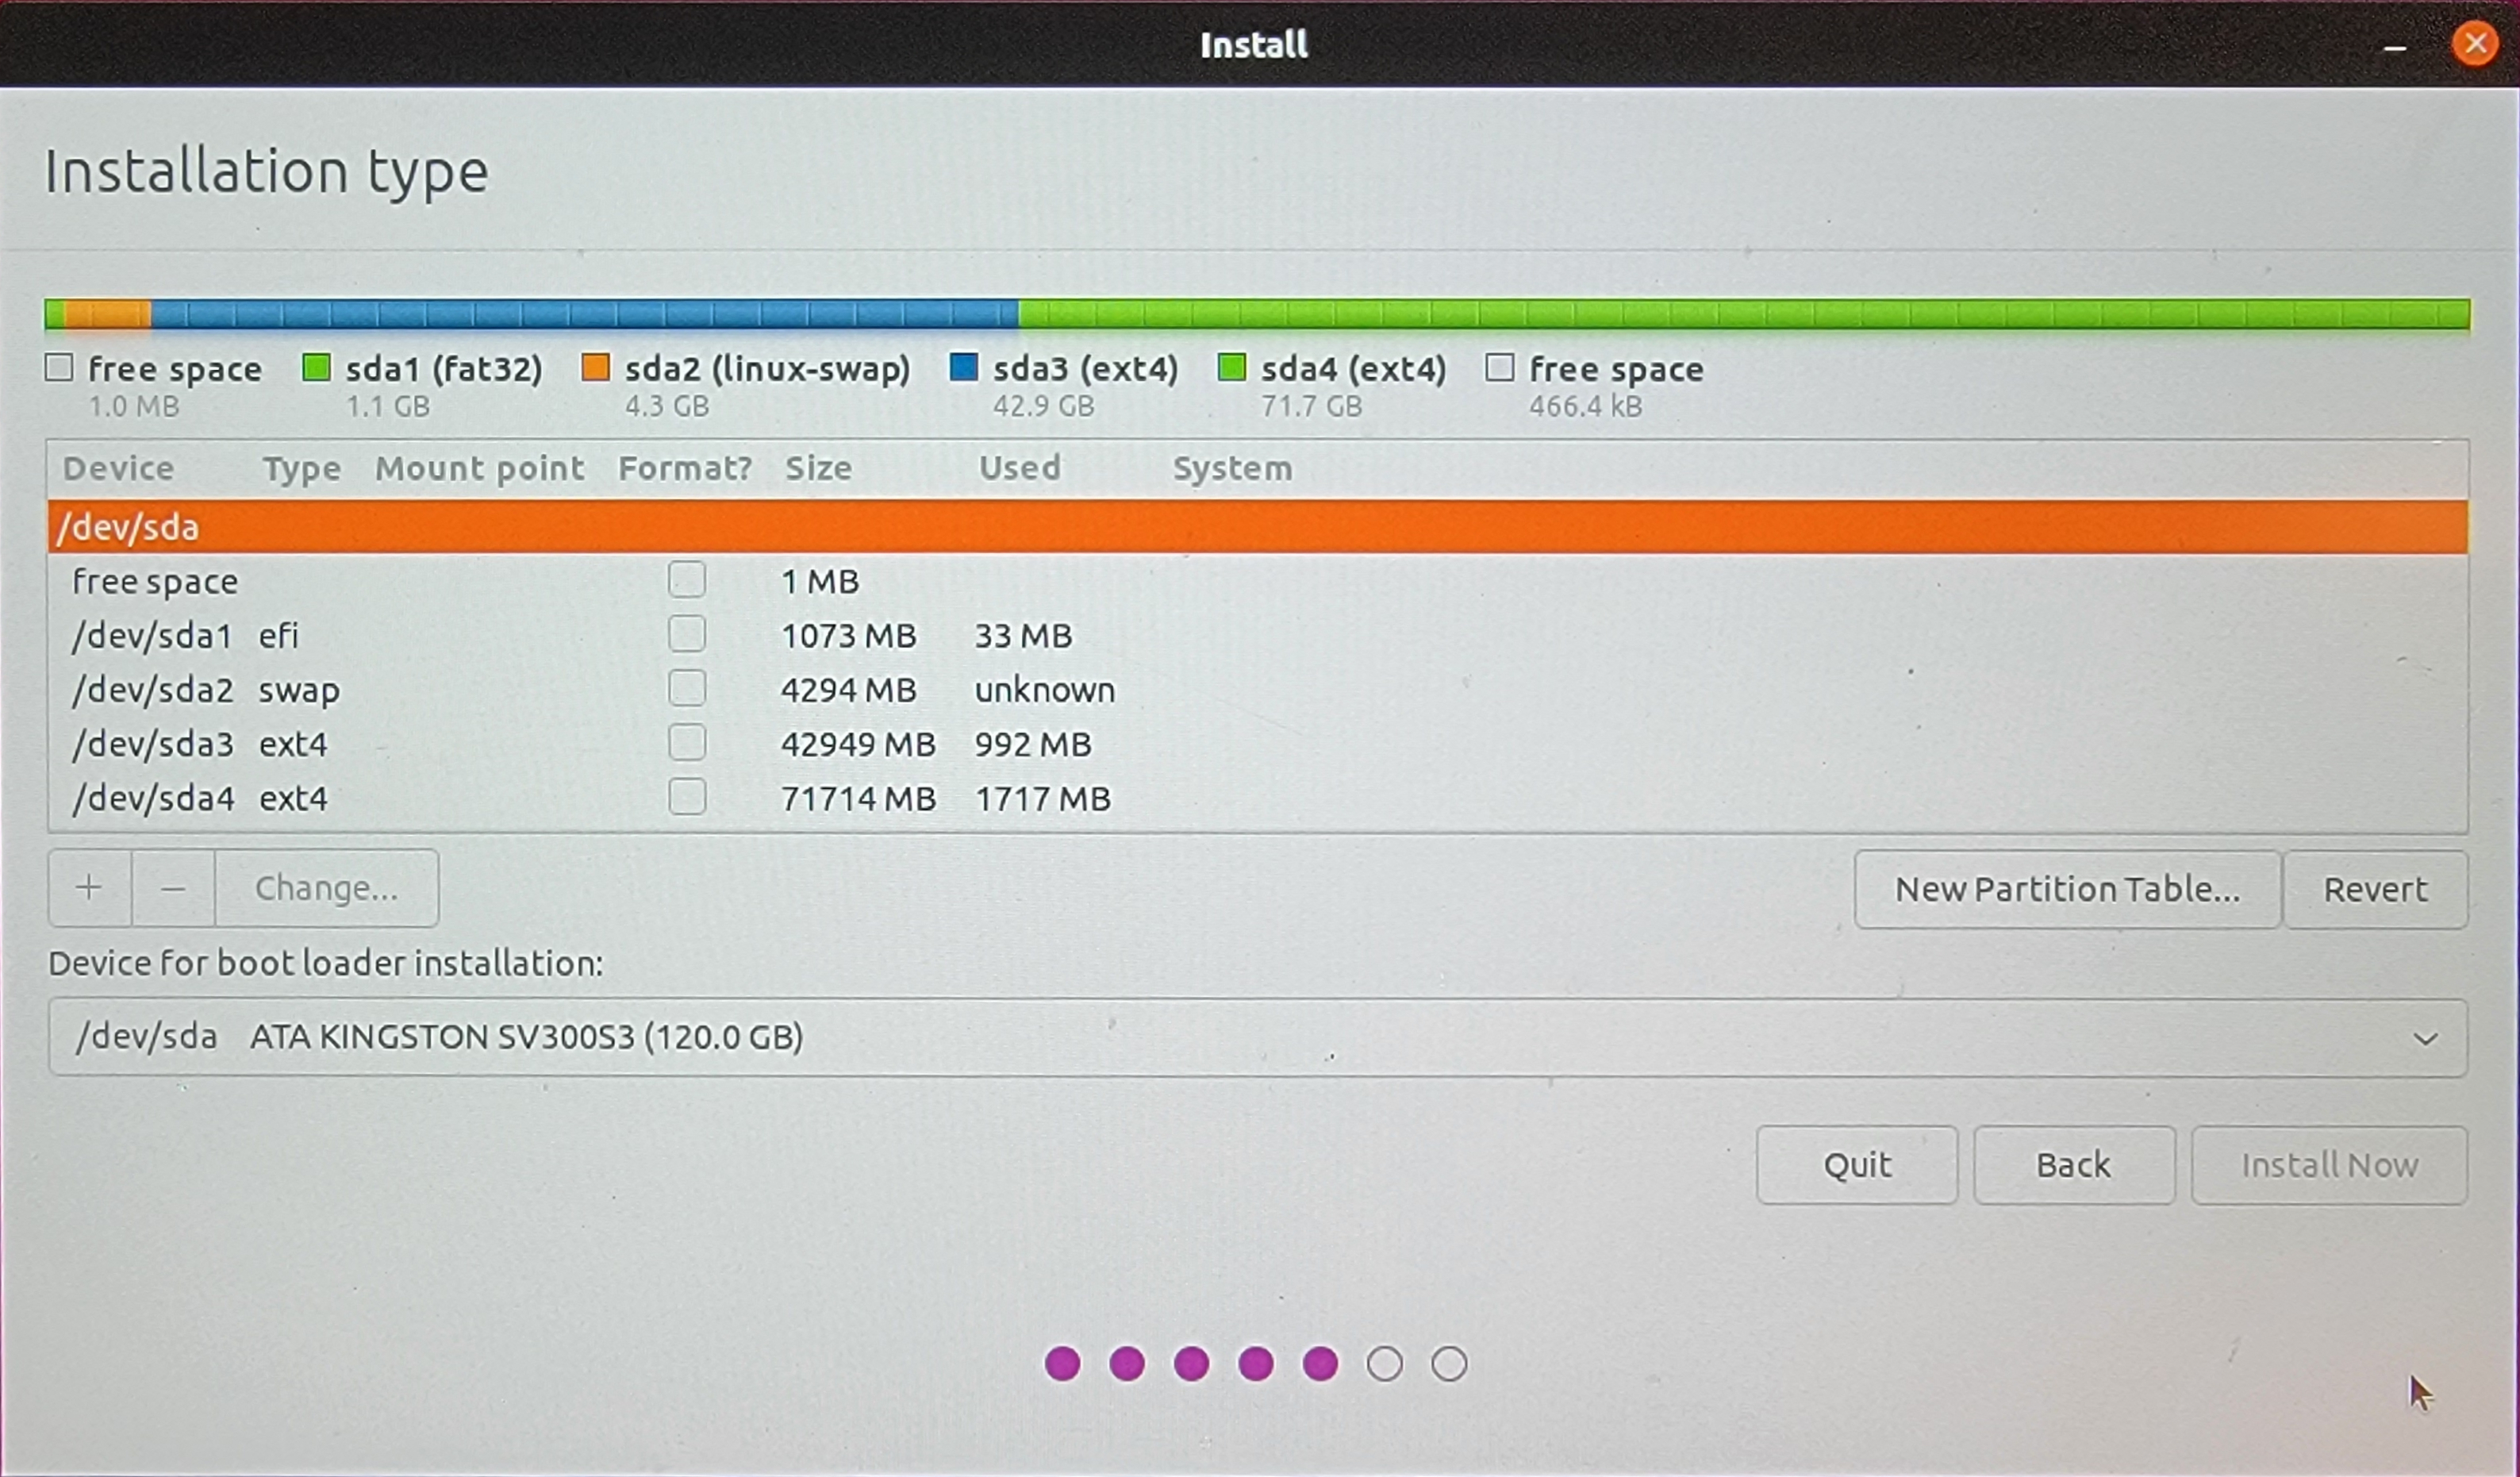
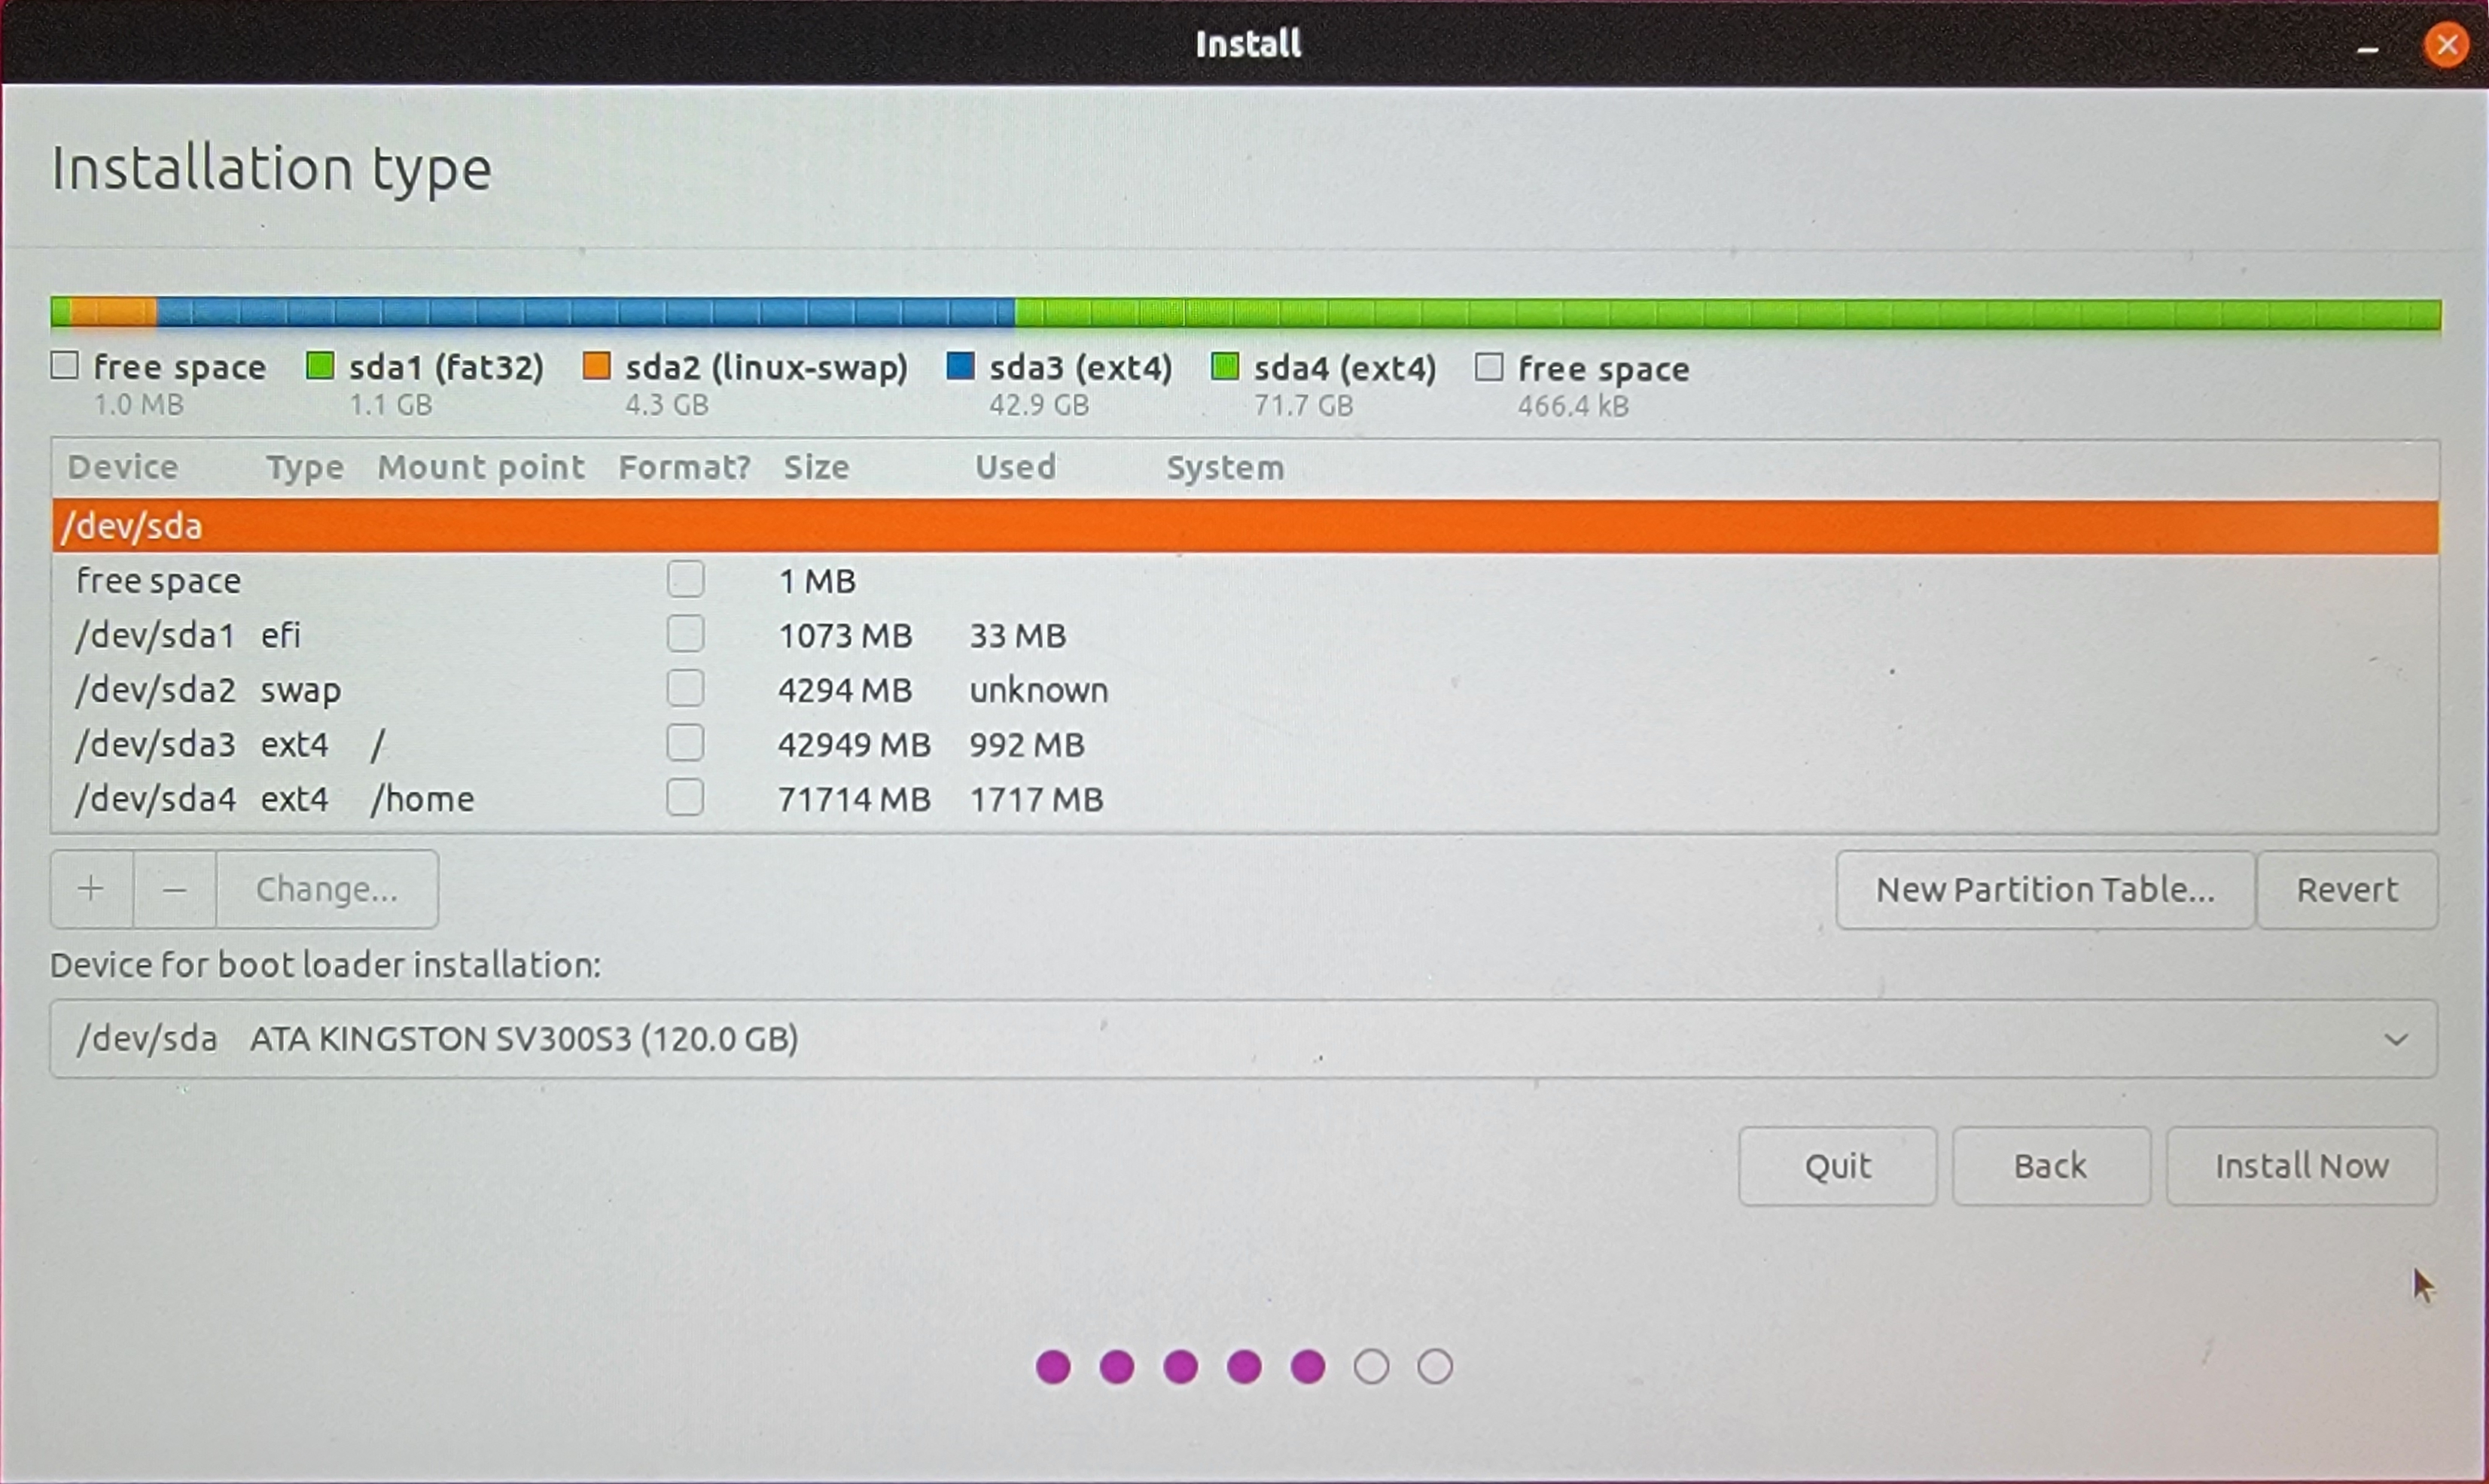
6. Installation type: you will see the partition created by GParted (see above).
You will need to make only two modifications in the third and fourth partitions:
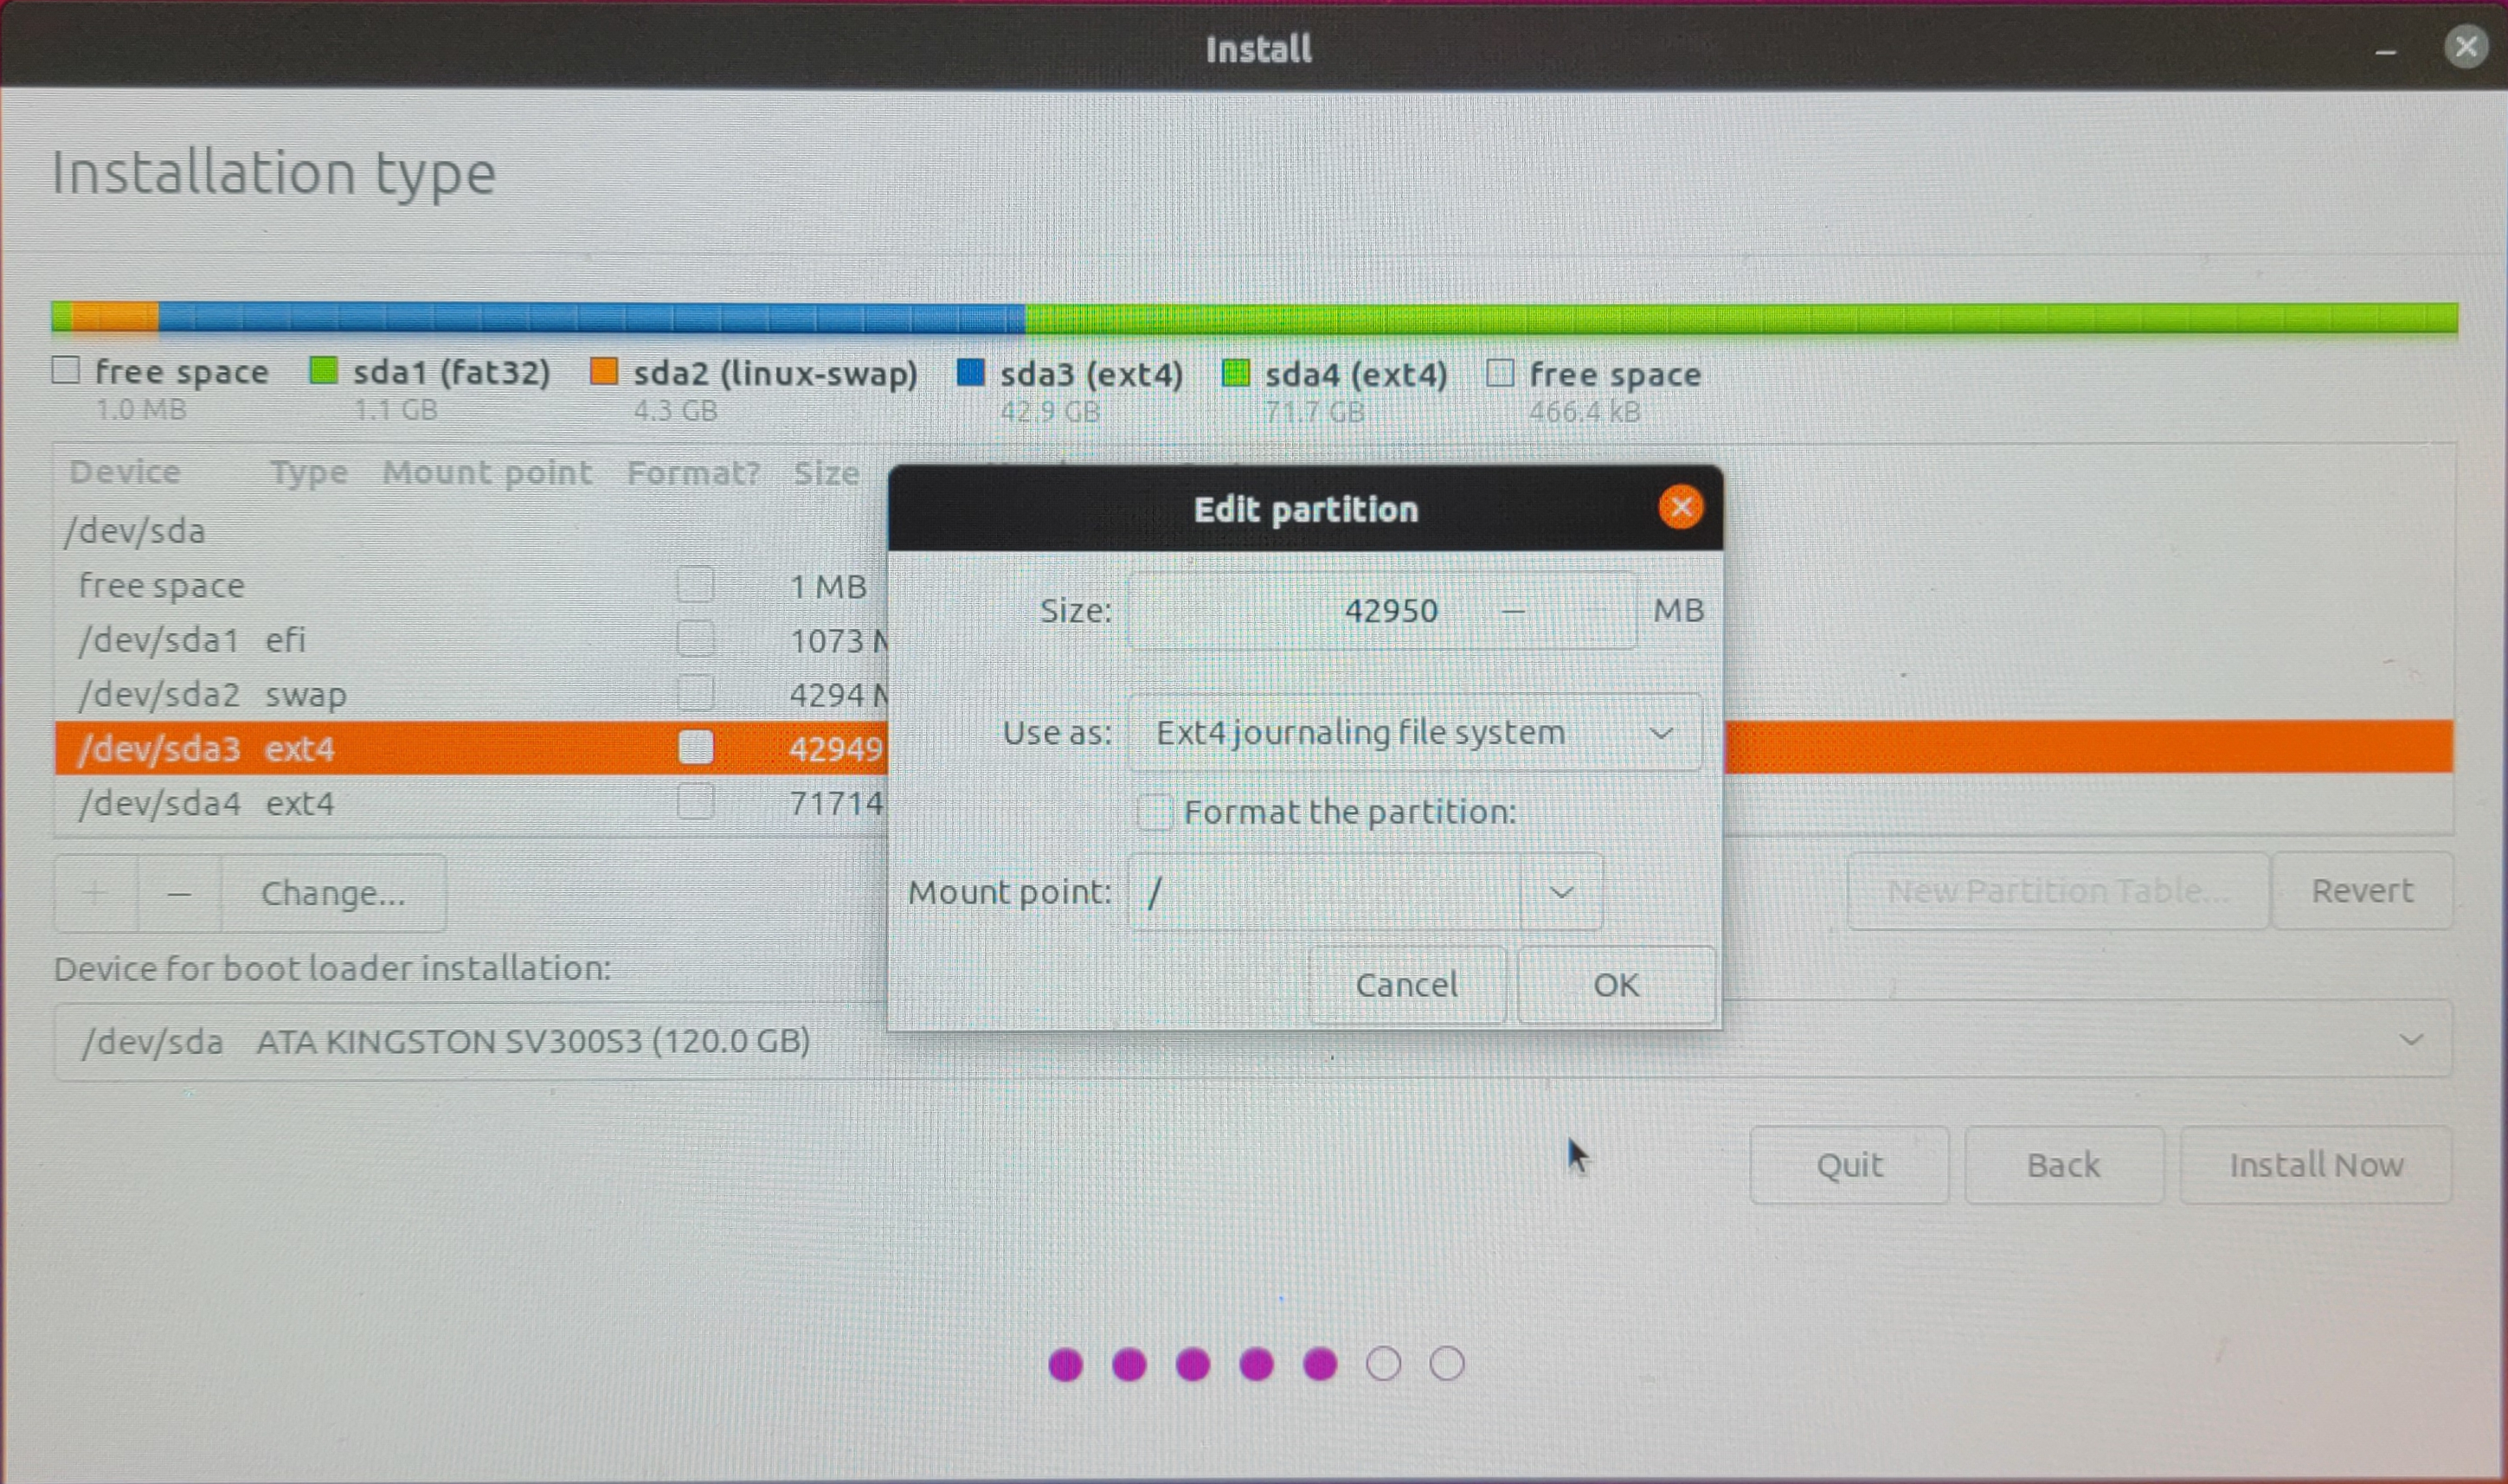
7. Right click partition '/dev/sda3' | Edit and the 'Edit parition' dialog pops up.
At 'Use as:' select 'Ext4 journaling file system' from the pull down menu.
At 'Mount point:' select '/' from the pull down menu. Leave 'Size:' and
'[ ] Format the partition:' alone, since this was done by GParted.
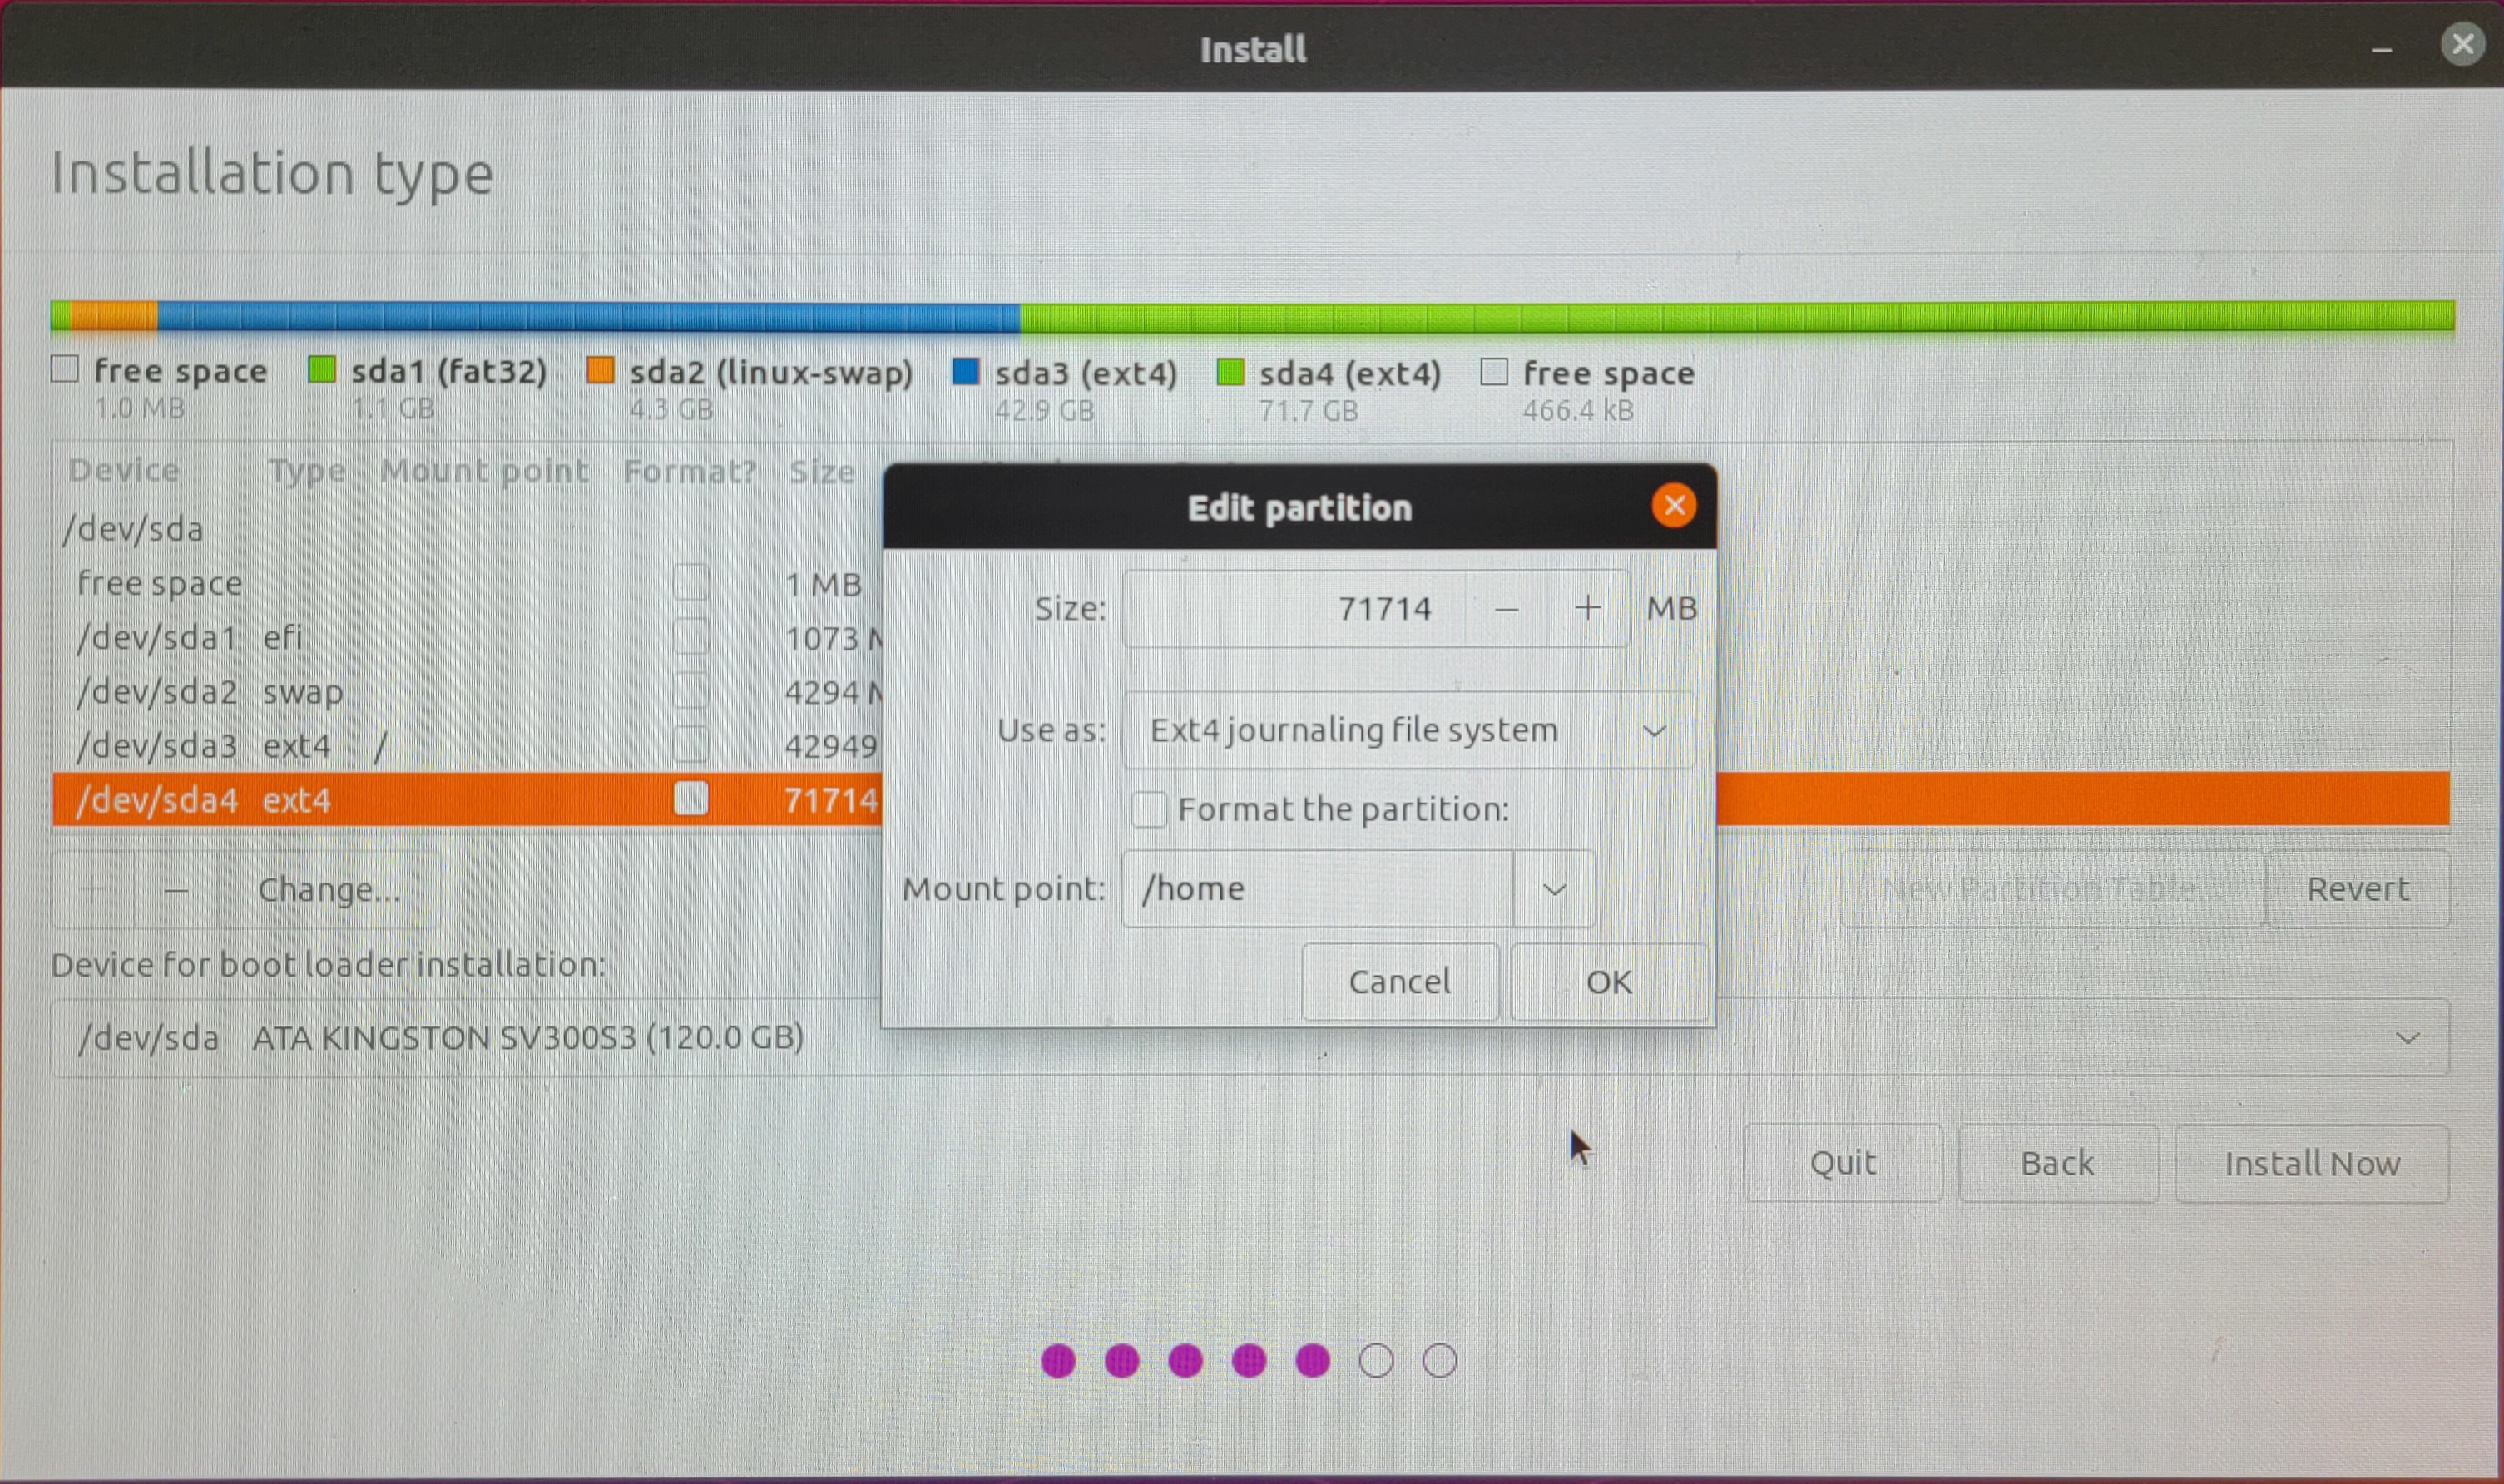
8. Right click partition '/dev/sda4' | Edit and another 'Edit partition' dialog pops
up. At 'Use as:' select 'Ext4 journaling file system' from the pull
down menu. At 'Mount point:' select '/home' from the pull down menu.
Again, leave 'Size:' and '[ ] Format the partition:' alone:
9. The final Install dialog should look like the following screen. Click the button
'Install Now':
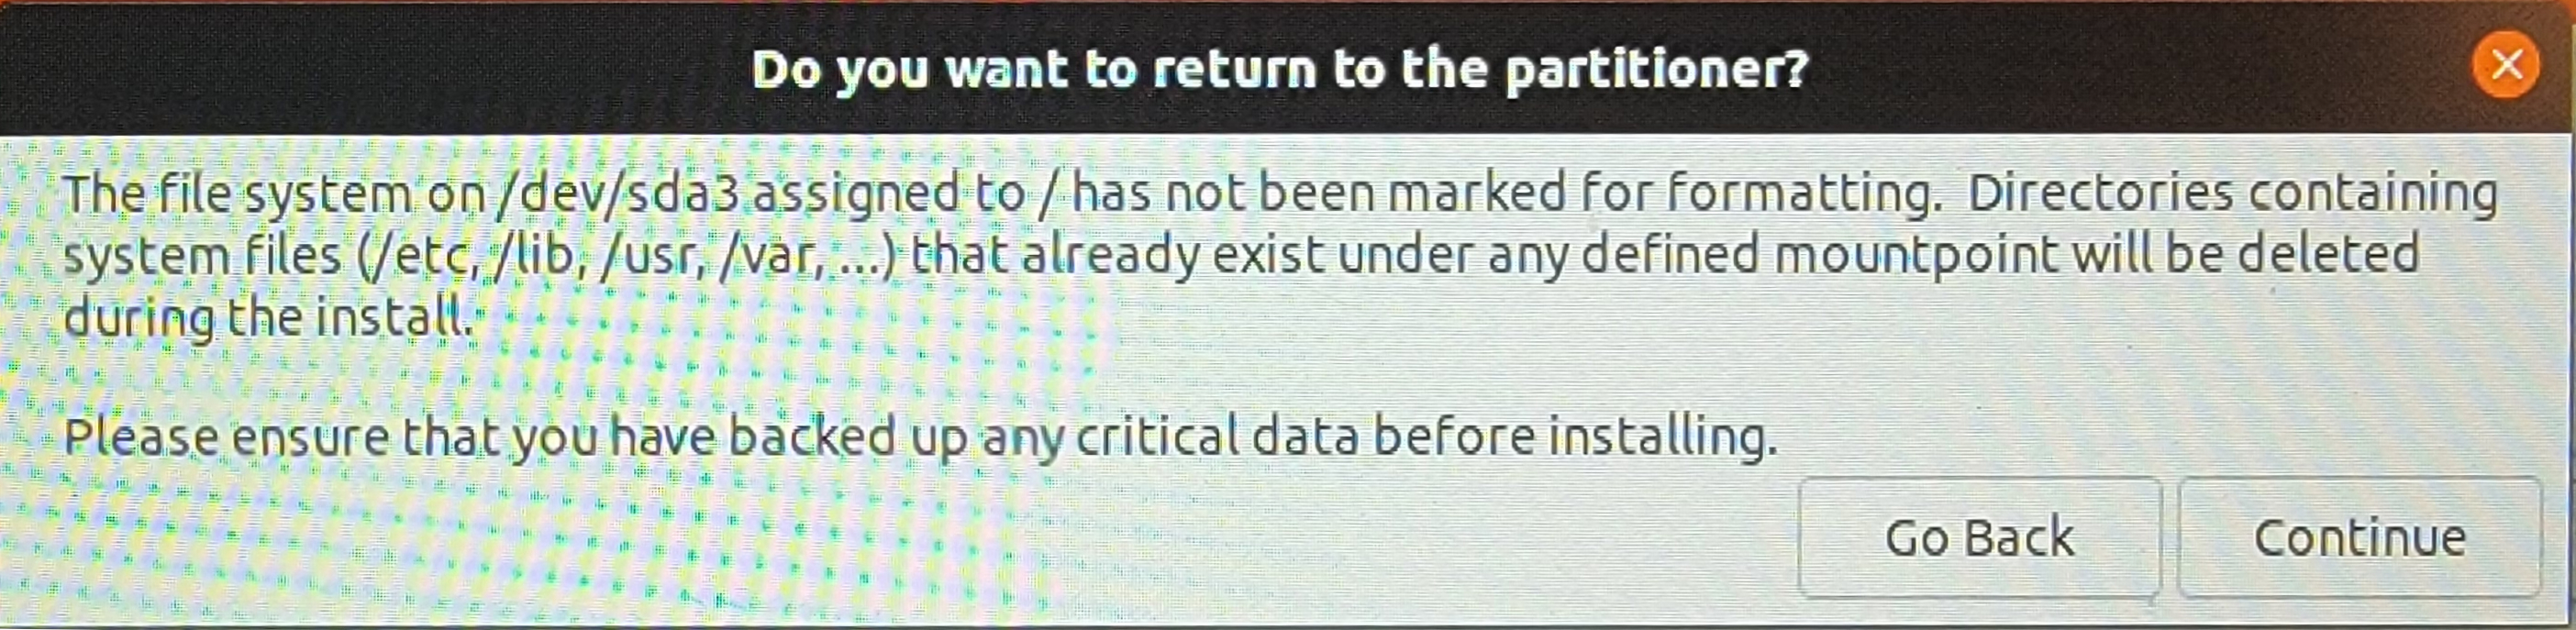
10. At the dialog 'Do you want to return to the partitioner?', click the button
'Continue':
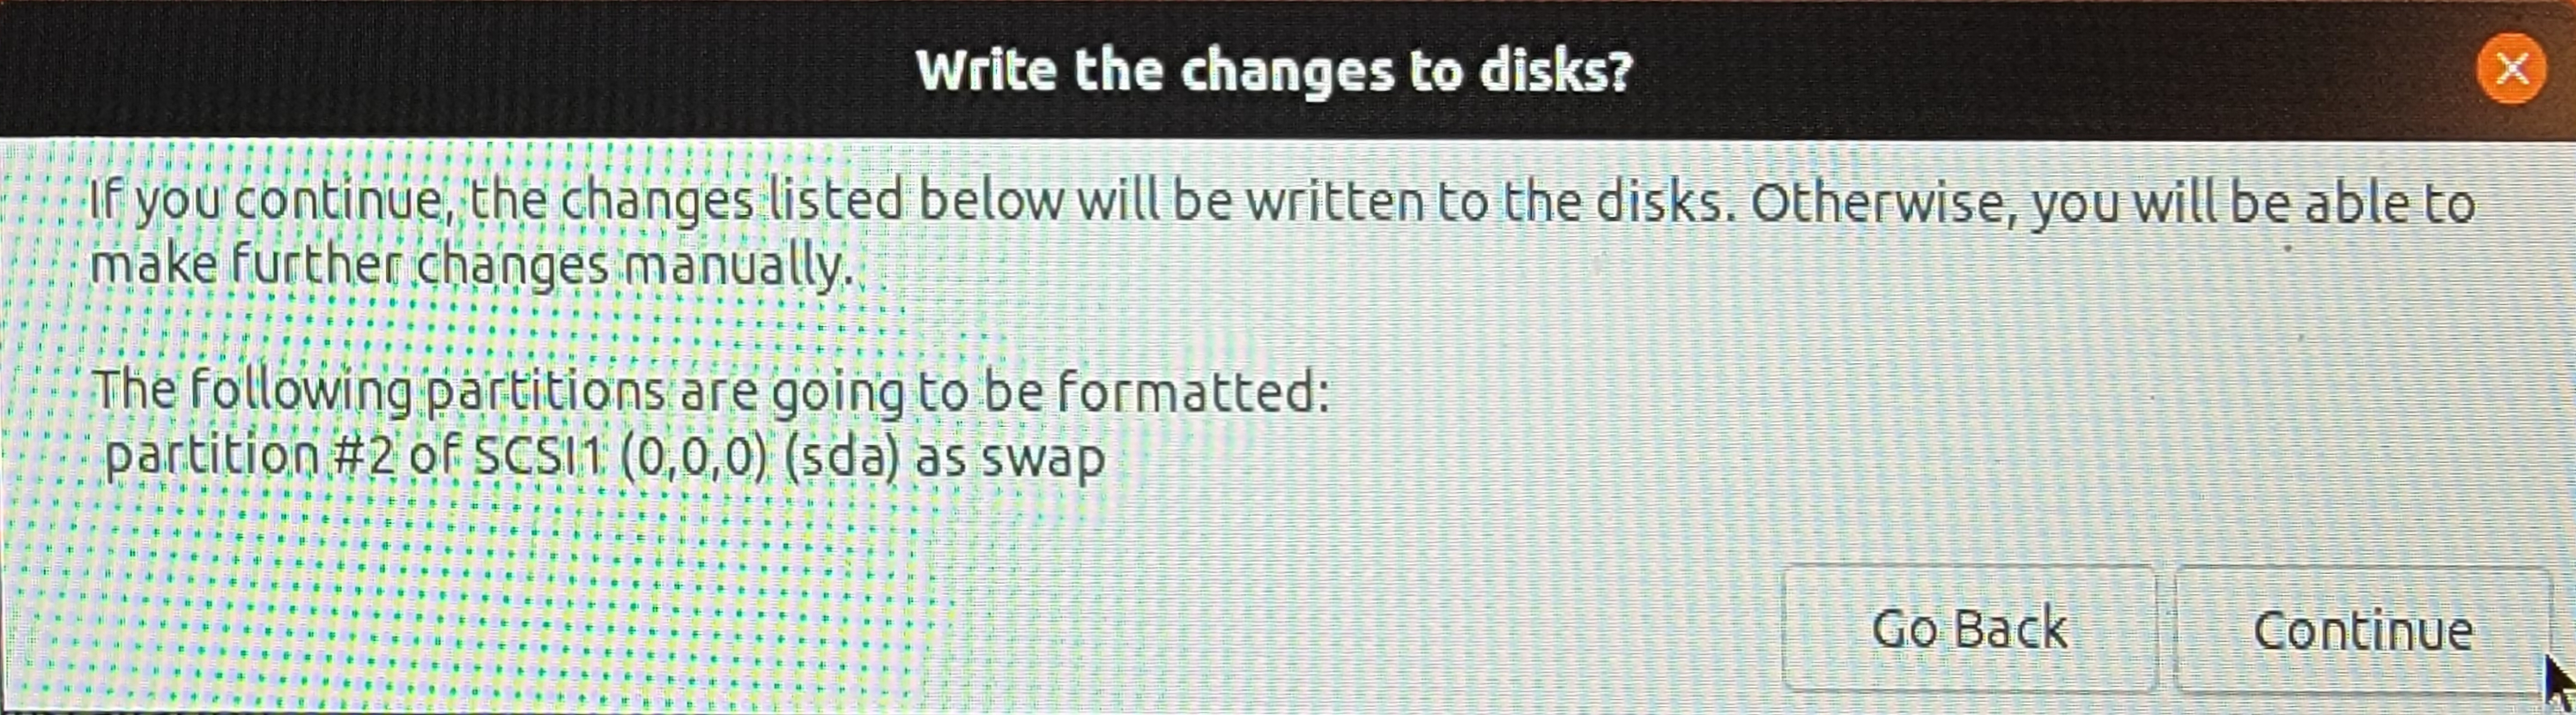
11. At the dialog 'Write the changes to disks?', click the button 'Continue':
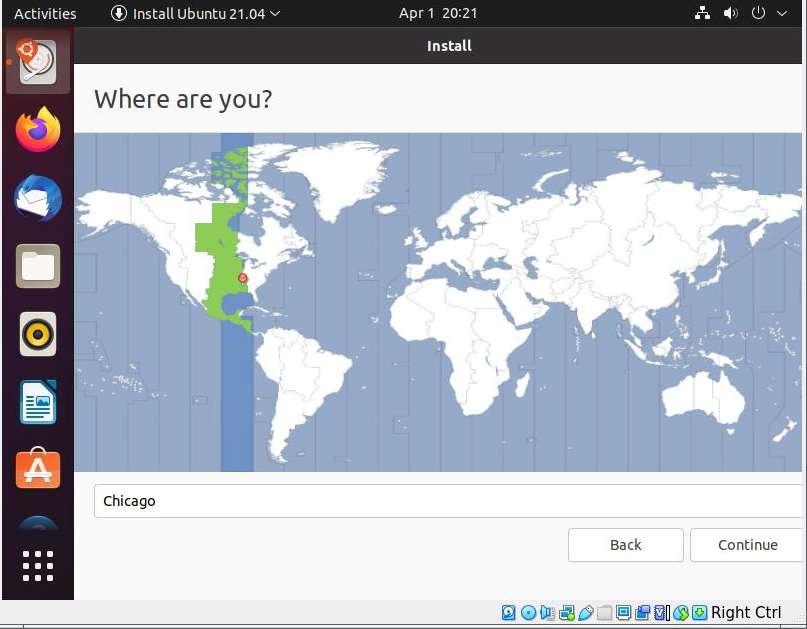
12. Where are you?: If you are connected to the internet, this screen may
have selected your time zone automatically. If not, then you can click on the screen
or use the pulldown menu to fine tune your selection. Then hit 'Continue':
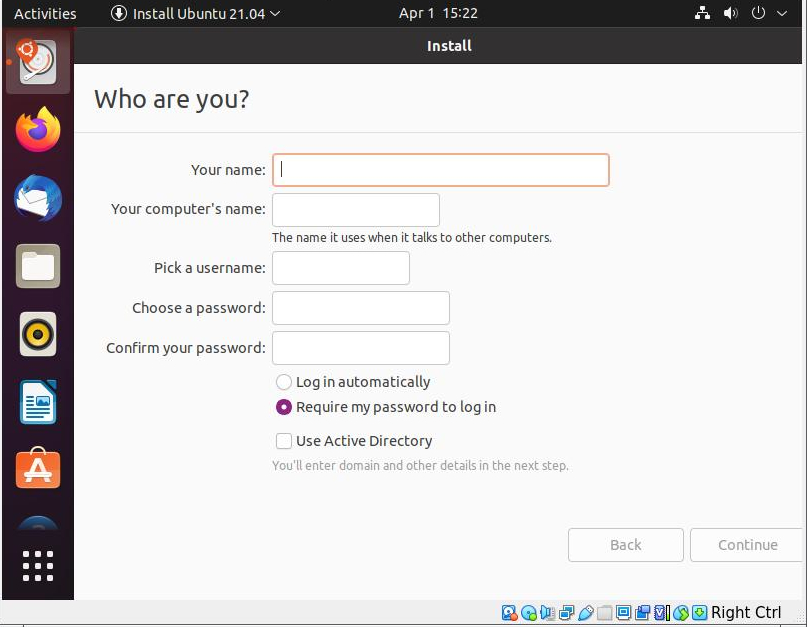
13. Who are you?: At 'Your name:' enter your name (you may use proper case).
At 'Your computer's name:', select a computer name, (again you may use proper case).
At 'Pick a username:' enter your first name in lower case. At 'Choose a password:',
it is recommended to use a complex password if you are in a public location; however,
if you are at home and you control your access, you can pick a simple password.
Leave the default '(*) Require my password to log in'. Click the button 'Continue':
14. The Install dialog will take a long time. At this point, you can walk away
for about 20-30 minutes:

15. When the installation is complete, you shall see this dialog 'Installation Complete'.
Click the button 'Restart Now'. Make sure to pull out the installation disc:

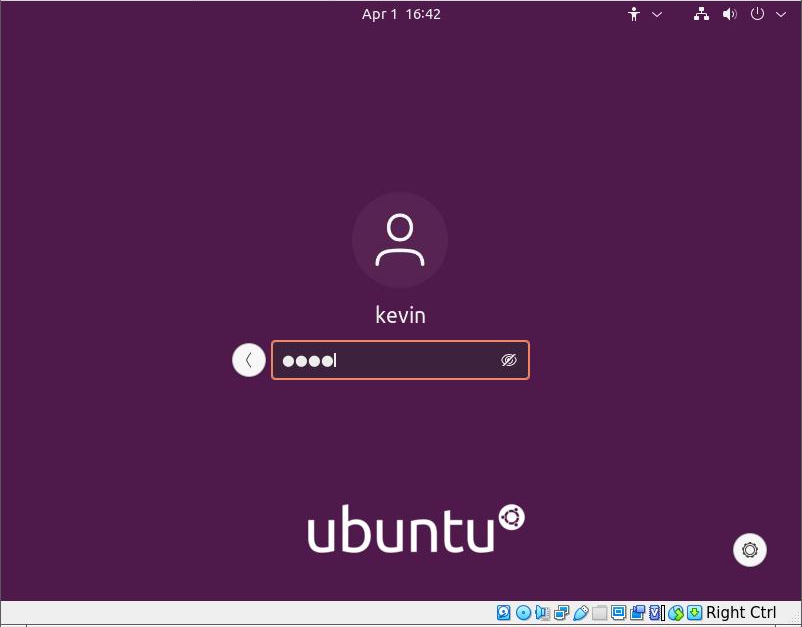
16. Your computer shall reboot into a log in screen. Click on the <username>.
(My user name is 'kevin'.):

17. This opens the password field. Enter your <password>. :
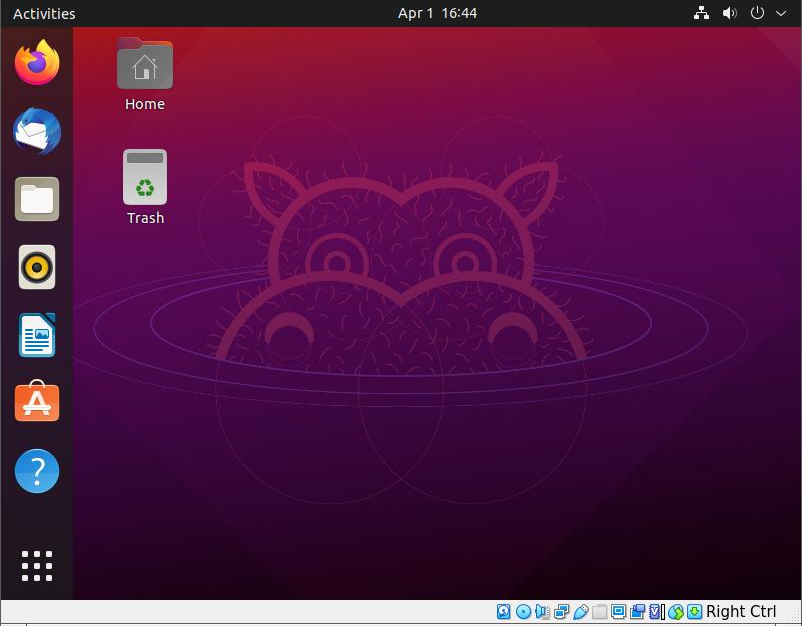
18. You should log into the following desktop. You will notice that the Install
icon is now gone. On the left is a quick launch panel. You can drag new icons to
this panel:
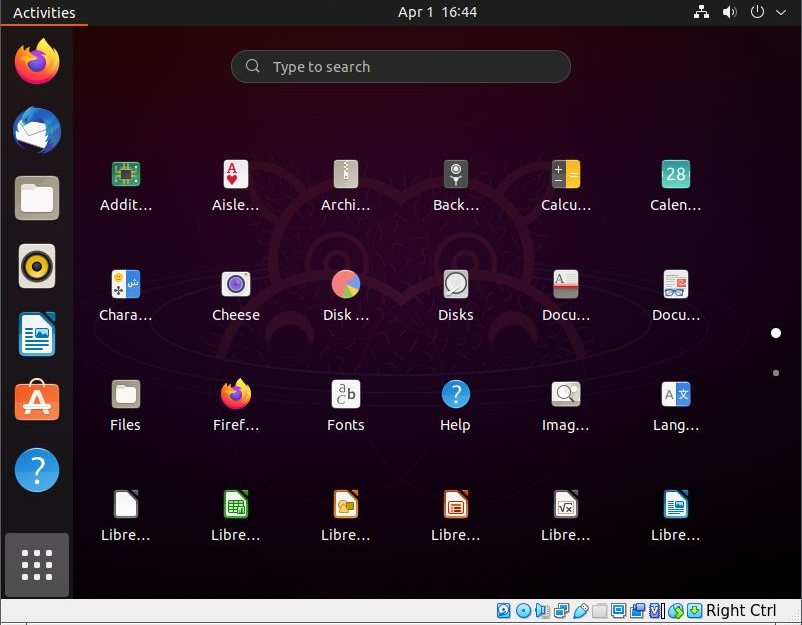
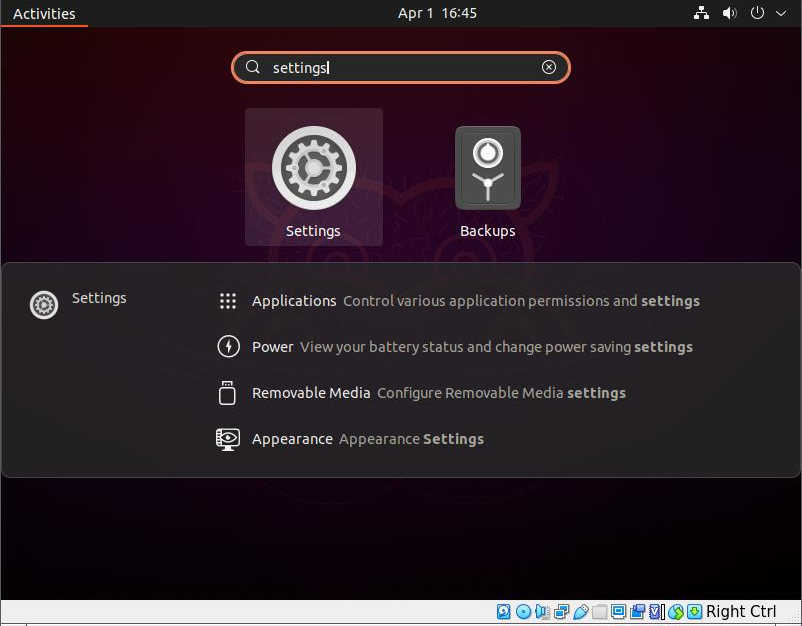
19. In the Gnome Unity Desktop Environment (DE), you can click the square
elypsis in the lower left corner, or you can type the <window key> from the
keyboard which will launch a search field. Below the search field are the first
set of applications. You can swipe the screen to display the next page of
applications:
20. Here I type 'settings', which brings up the 'Settings' application. You can
type your own search here which will launch any application you wish, such as
'word', 'calc', etc:
In the next section, we shall configure our operating system (OS).
top of page